The pages aim to guide new players through the Standard Battle ladder of Injustice: Gods Among Us Mobile. This assumes you are already familiar with the very basics of the game; if you aren't, please check out the Beginner's guide.
A list of all of the matches in the Standard Battle mode can be found here.
Overview
Power gain
In Standard battle, characters gain more power when being hit than attacking. Therefore, it's usually recommended to use heavy combo if you can rather than light combo as it deal more damage per hit to avoid giving opponents too much power, except some characters who have strong light combos that synergize with their passives such as Jessica Cruz/Rebirth. In addition, you may want to be hit unblocked by (weak) enemies' basic attacks in order to gain more power and build power to perform Super Moves, which deal high, unblockable damage. And since both you and AI gain power pretty fast, power drain is crucial, especially against stronger enemies.
Bosses and enemies stronger than you
As you play, you will encounter boss and mini-boss characters, who have boosted stats that usually higher than your current characters, or enemy characters with very high level and promotion. You can't just simply fight toe to toe against them as they will crush you with their superior stats. The key here is reducing their offense, usually special attacks. Power drain is an effective tool to do so, rendering them with no power to use their powerful specials. Killer Frost/Prime is an excellent choice, her passive reduce enemy team's power generation by 50%, greatly reducing the threats. Against enemies with gigantic health, players should use attacks that deal damage based on health percentage such as Batgirl/Cassandra Cain's tag-in attack or The Joker/Insurgency's death damage. DOT gears such as The Ibistick work wonder, especially when paired with The Master's Death Cart as its tag-in attacks can also apply DOT from those gears if a special is used during that time (can be exploited by Aquaman/Prime with Tantu Totem equipped, for more detail, see those pages). Batman/Batman Ninja's SP2 can help killing bosses a lot with the right setup. Additionally, some characters and gear can heal which might save you, particularly Harley Quinn. Play carefully and you should be able to win.
Some characters have their passives function differently against Boss and Mini-Boss. For more details, see their pages.
Challenges
(not to be confused with Challenge Mode)
Also called handicaps, they are the modifiers that provide negative effects for players or advantages for AI, including:
- Broken Alliance 1: only the first character of your team can fight. This is by far the hardest Challenge.
- Broken Alliance 2: only the first 2 characters of your team can fight. A easier version of Broken Alliance 1.
- Chaos: your characters will tag randomly with no control at all.
- Countdown: you have to win during the time limit.
- Dampening Field: your power generation is reduced.
- Disable Special: your specials are disabled, they could be SP1, SP2 and/or Super Moves.
- Half-a-Hero: your team's special and Super Move damage is halved.
- Life Drain: opponents gain health equal to a percentage of the damage they deal
- Mirror Match: Enemy teams will be as same as your team, but with fixed level, promotion, power bars unlock and without gears and augments.
- No Supermoves: Super Moves cannot be used.
- Power Surge: both your team and the enemy team will have increased power generation.
- Radiation: the character you currently have tagged in would constantly lose a small percentage of his/her maximum health every second.
- Random Enemies: your opponents will be unknown until you enter the match.
- Regeneration: all enemies regenerate health every second.
Gear
The AI can't use gears — but you can! This aspect of Standard Battle gives players a greater edge than any other. With the right gears and strategy, you can defeat even the strongest of foes with the weakest of characters. Consider playing Online Battle and Survivor Mode to collect stronger gears — they will certainly help a lot.
Some especially useful gears to use in Standard Battle:
- The Ibistick: Its DOT deal damage based on health percentage, making it a lethal weapon against bosses and enemies with high health.
- LexCorp Helmet V2 and League of Assassins Adept Blade: Their DOTs are weaker versions of The Ibistick's one, but you can use them as a replacement since these two can be collected from Survivor Mode.
- The Master's Death Cart: Its tag-in attacks can apply DOT from three gears above. Noted that it will also give the opponents a lot of power, so fight quickly.
- Tantu Totem: The power generator - it can provide a lot of power to bombard with special attacks, or punish Batman/Dawn of Justice and Wally West/Rebirth bosses. Harley Quinn can heal your team to full health thanks to its power refund effect.
- Astro-Harness: An excellent defensive gear that can almost ensure your survival against powerful aggressive enemies. This is one of the most important gear to deal with enemies that are far stronger than you, particularly bosses.
- Enchantress Companion Card EVOLVED: After performing a special, this gear can prevent enemy team from using their specials until all of the flying skulls have hit the enemy. In addition, the skulls can apply DOTs from the first 3 gears above. This is especially useful to deal with high damage enemies, whose specials can knock your character(s) out with just a single use.
- Gears that boost Basic attacks or power generation.
Gears that have limited usage (not totally useless) in Standard Battle (they are quite strong in other game modes):
- Claw of Horus: Disable gear effect is useless as AI doesn't have gear equipped in this mode.
- Mother Box: The only serious usage of this gear is for enemy Batman/Arkham Origins and Batgirl/Prime, notoriously the boss on area 7. It can drain all of their starting power.
- Brandished Ninjato: Except on Nightwing, this gear doesn't have much use here beside the health boost as you rarely see area effect from enemies.
Gears can make battle become much easier than which stated in this guide. However, that applies to early stage of the game only, as the last 3 areas are almost impossible to beat without gears, and such, gears strategy will be included in those sections. Gear is the better investment than character in the long run.
Recommended characters
Early on, the store provides a lot of characters, but there are some that are better than others. For each tier, these are some store characters that may worth spending for early:
- Deathstroke/Insurgency: his high stats and powerful SP2 can help you easily clear the enemy teams early.
- Lex Luthor/Prime: proving unrivaled damage boost for both bronze and silver characters!
- Nightwing/Prime: a good tank with power drain on SP1.
- The Flash/Prime: best basic attacker who can juggle enemy with his fast heavy combo, especially after boosted by his passive.
- Cyborg/Regime: His passive is bugged and will increase his power generation by the massive 50% even when he's the active character!
- Nightwing/Regime: an upgrade of his bronze variation.
- Green Lantern/Regime: arguably the best silver character, his power generation increase can empower any team, even for gold characters.
- The Flash/Regime: best silver basic attacker.
- Wonder Woman/Prime: the best silver damage dealer thanks to her passive. She can also chain her SP1 from heavy combo.
- Doomsday/Prime: a cheap, powerful character overall.
- Harley Quinn/Animated: the best and most economical support character in store who can provide heal, damage and power generation boosts for the entire team!
- Lex Luthor/Krypto: good supportive passive with power drain on SP1.
- The Joker/Insurgency: boss-killer and can be further enchanted by Harley Quinn/Animated. He is available as a daily reward (day 80) if you don't want to spend.
Later, will an expanded collection, you could use any character you want. Team synergy is very important, and your available gears can affect which characters you should use at a point. You may be interested in Character Tier List; however, it may not truly apply in Standard Battle as unlike Online Battle, you generally fight against (much) stronger enemies and with a different power gaining mechanic in this mode.
Grind
Power credits
(You can tap on a header cell to sort its column)
| Order | Battle # | Credits | Average Credits/Energy | Average Credits/Fight |
|---|---|---|---|---|
| 1 | 1 | 230 | 25.6 | 230 |
| 2 | 2 | 780 | 86.7 | 260 |
| 3 | 3 | 1,120 | 93.3 | 280 |
| 4 | 4 | 1,500 | 100.0 | 300 |
| 5 | 5 | 1,900 | 126.7 | 380 |
| 6 | 6 | 1,600 | 106.7 | 320 |
| 7 | 7 | 1,260 | 70.0 | 420 |
| 8 | Bonus 1 | 5,320 | 110.8 | 665 |
| 9 | 8 | 2,350 | 78.3 | 470 |
| 10 | 9 | 2,400 | 80.0 | 480 |
| 11 | 10 | 2,450 | 81.7 | 490 |
| 12 | 11 | 3,040 | 101.3 | 608 |
| 13 | 12 | 2,550 | 85.0 | 510 |
| 14 | 13 | 2,600 | 86.7 | 520 |
| 15 | 14 | 2,060 | 76.3 | 686.7 |
| 16 | Bonus 2 | 8,120 | 112.8 | 1015 |
| 17 | 15 | 3,350 | 111.7 | 670 |
| 18 | 16 | 3,400 | 113.3 | 680 |
| 19 | 17 | 3,450 | 115.0 | 690 |
| 20 | 18 | 4,240 | 141.3 | 848 |
| 21 | 19 | 3,550 | 118.3 | 710 |
| 22 | 20 | 3,600 | 120.0 | 720 |
| 23 | 21 | 2,860 | 105.9 | 953.3 |
| 24 | Bonus 3 | 10,920 | 151.7 | 1365 |
| 25 | 22 | 4,350 | 145.0 | 870 |
| 26 | 23 | 4,400 | 146.7 | 880 |
| 27 | 24 | 4,450 | 148.3 | 890 |
| 28 | 25 | 5,440 | 181.3 | 1088 |
| 29 | 26 | 4,550 | 151.7 | 910 |
| 30 | 27 | 4,600 | 153.3 | 920 |
| 31 | 28 | 3,660 | 135.6 | 1220 |
| 32 | Bonus 4 | 12,680 | 176.1 | 1585 |
| 33 | 29 | 7,630 | 181.7 | 1090 |
| 34 | 30 | 7,700 | 183.3 | 1100 |
| 35 | 31 | 5,450 | 181.7 | 1090 |
| 36 | 32 | 6,640 | 221.3 | 1328 |
| 37 | 33 | 6,720 | 186.7 | 1120 |
| 38 | 34 | 7,980 | 190.0 | 1140 |
| 39 | 35 | 4,460 | 165.2 | 1486.7 |
| 40 | Bonus 5 | 15,280 | 212.2 | 1910 |
| 41 | 36 | 19,020 | 162.6 | 1463.1 |
| 42 | 37 | 25,360 | 165.8 | 1491.8 |
| 43 | 38 | 19,300 | 214.4 | 1484.6 |
| 44 | 39 | 19,120 | 132.8 | 1195 |
| 45 | 40 | 10,720 | 148.9 | 1340 |
| 46 | 41 | 10,800 | 150.0 | 1350 |
| 47 | 42 | 12,310 | 171.0 | 1538.8 |
| 48 | Bonus 6 | 20,850 | 463.3 | 4170 |
| 49 | 43 | 7,350 | 163.3 | 1470 |
| 50 | 44 | 7,400 | 164.4 | 1480 |
| 51 | 45 | 12,160 | 168.9 | 1520 |
| 52 | 46 | 12,240 | 170.0 | 1530 |
| 53 | 47 | 12,320 | 171.1 | 1540 |
| 54 | 48 | 12,400 | 172.2 | 1550 |
| 55 | 49 | 14,110 | 196.0 | 1763.8 |
| 56 | Bonus 7 | 30,700 | 284.3 | 2558.3 |
| 57 | 50 | 8,350 | 185.6 | 1670 |
| 58 | 51 | 10,120 | 224.9 | 2024 |
| 59 | 52 | 13,760 | 191.1 | 1720 |
| 60 | 53 | 15,640 | 217.2 | 1955 |
| 61 | 54 | 17,520 | 243.3 | 2190 |
| 62 | 55 | 15,820 | 219.7 | 1977.5 |
| 63 | 56 | 15,910 | 221.0 | 1988.8 |
| 64 | Bonus 8 | 37,240 | 517.2 | 4655 |
| 65 | 57 | 9,350 | 207.8 | 1870 |
| 66 | 58 | 9,400 | 208.9 | 1880 |
| 67 | 59 | 15,360 | 213.3 | 1920 |
| 68 | 60 | 17,440 | 242.2 | 2180 |
| 69 | 61 | 15,520 | 215.5 | 1940 |
| 70 | 62* | 13,580 | 215.6 | 1940 |
| 71 | 63 | 17,710 | 246 | 2213.8 |
| 72 | Bonus 9 | 25,680 | 356.7 | 3210 |
Based on this chart, the most efficient battles for each page are Battle 5, Bonus Battle 2, Bonus Battle 3, Battle 25, Battle 32, Bonus Battle 6, Bonus Battle 7, Bonus Battle 8 and Bonus Battle 9, respectively.
However, if ignoring energy (by using multiple teams or recharges), the most effective battle for each page is the Bonus Battle of that page.
(*): Battle 62 has a missing match.
Grind in other game modes
Grinding other game modes can speed up the progress here, as you can collect powerful gears and characters to aid you in this mode. Challenge Mode is your main source of gold characters, and Online Battle and Survivor Mode are the main sources of legendary gears. Phantom Zone will also reward you with Nth Metal and characters (including powerful gold or even Nth Metal characters). It's impossible to beat Standard Battle without gear and character rewarded from other mode, so spend time playing other modes (especially Online Battle) as much as you can.
For the aiming at beginners purpose of this guide, progress from Area 1 to Area 6 will assume that you rarely spend time playing other game modes. From Area 7 and onwards, Challenge characters and legendary gears from Online Battle and Survivor Mode are basically required.
Winning your first match!
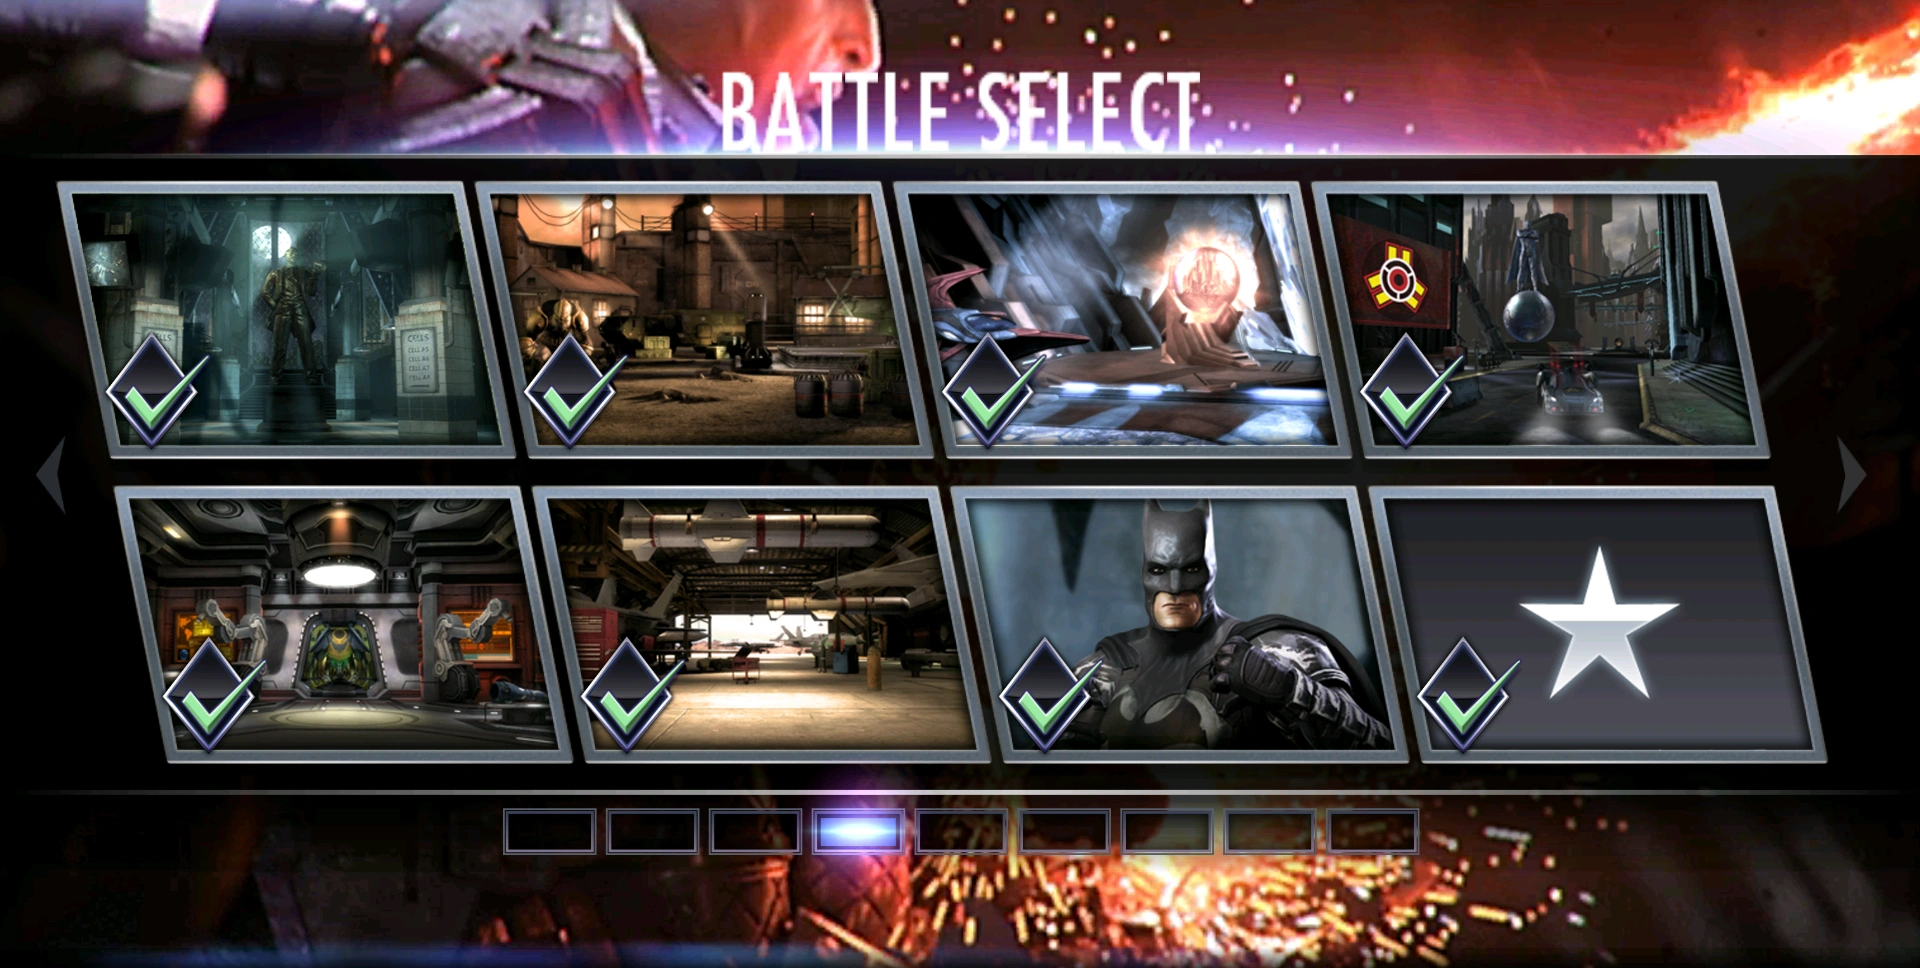
Area 1
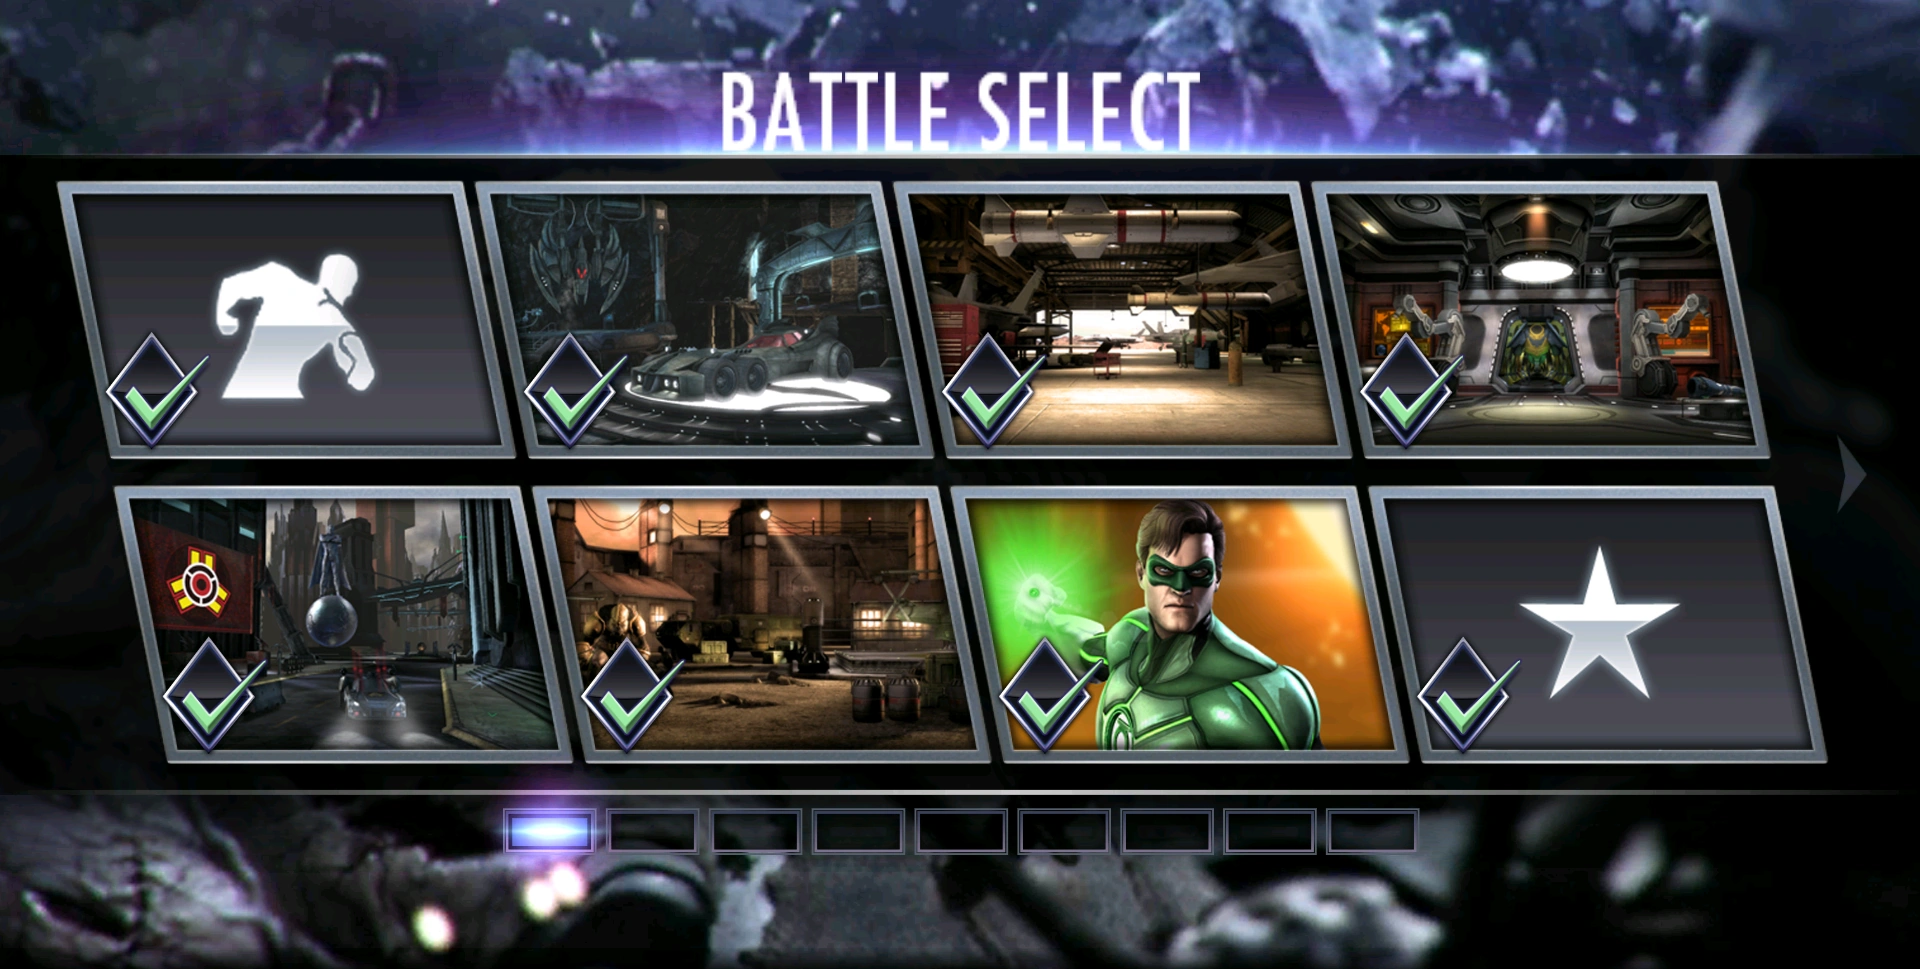
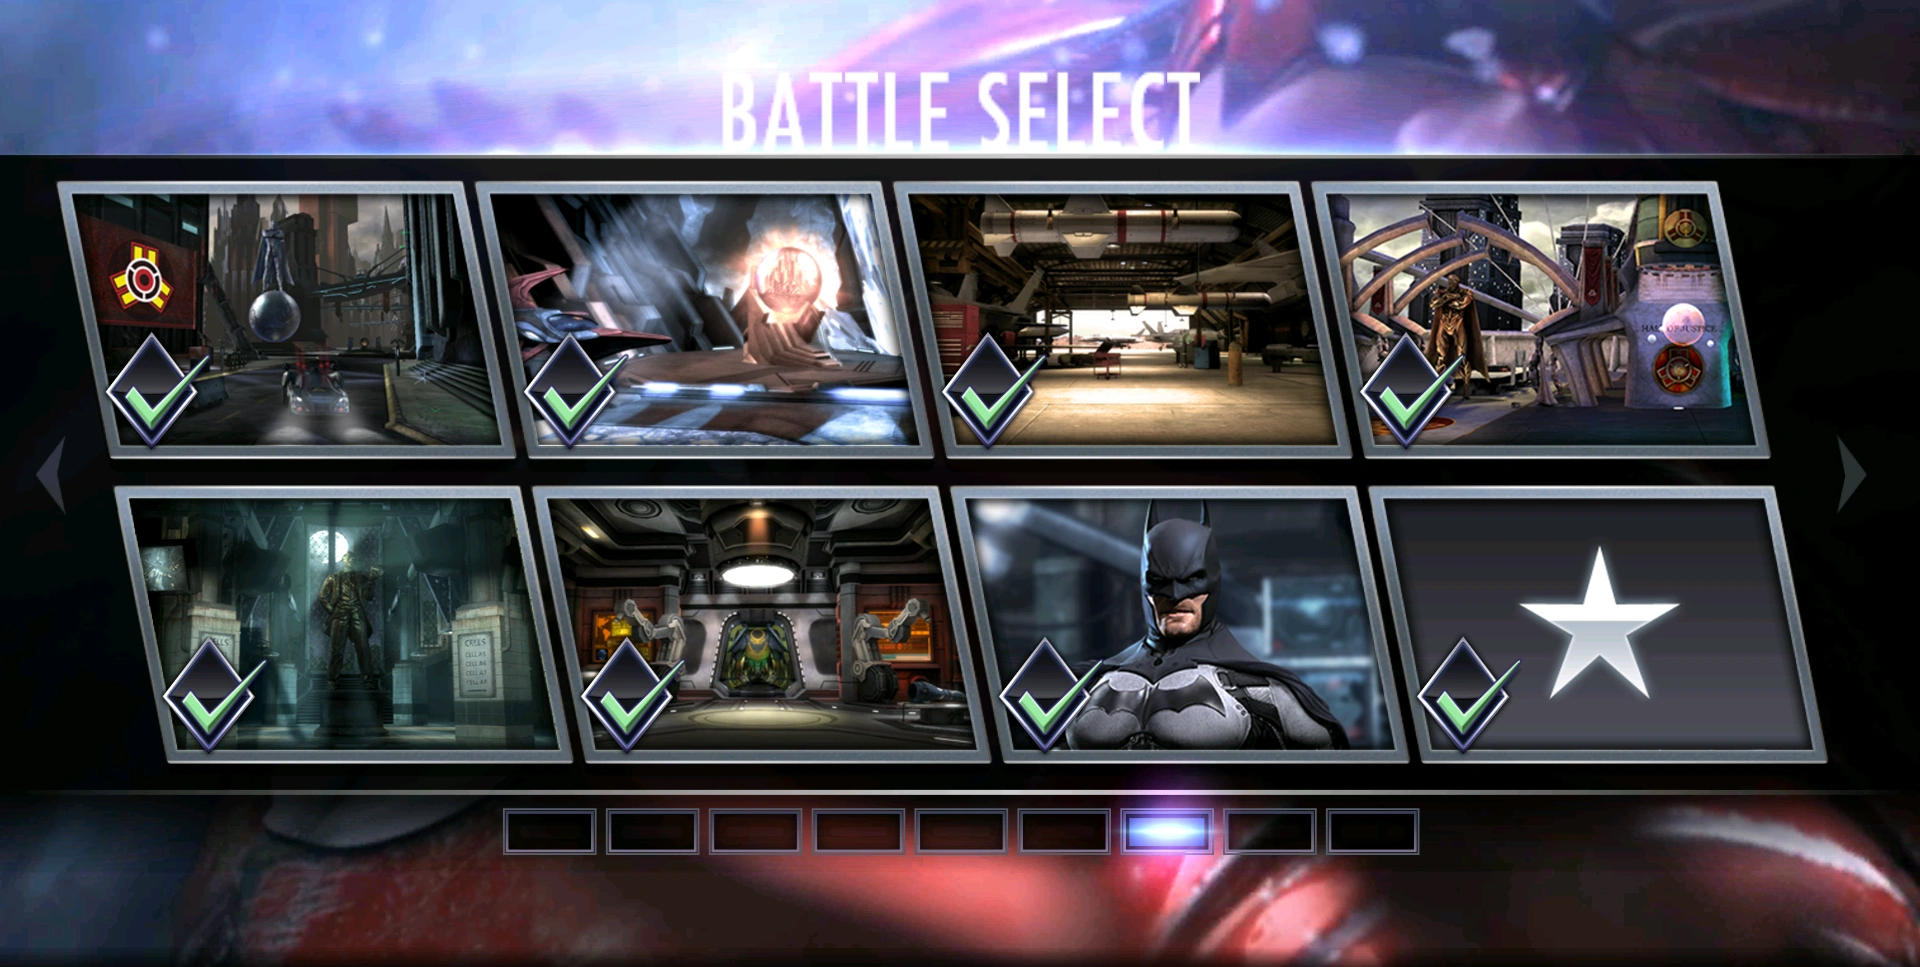
Area 1. The green tick indicates that battle has been completed.
Battle 1 is a tutorial where you can't lose.
There are four fights in Battle 2. Low level AI tends to play poorly: rarely blocking, attacking back, and often not using specials even when they have maximum power. Watch out for Sinestro/Prime; tagging out against him will give him power. Completing it for the first time yields Regime Catwoman and 1380 credits (4110 total including the first log in bonus and the tutorial).
The random mini-boss at the end of Battle 5 is the earliest stage in which you encounter an opponent with a second power bar unlocked. Try to prevent them from reaching two bars (power drain, such as that on the special 1 on Nightwing/Prime, who is given to all players after the tutorial, or Lex Luthor/Prime if you have him), and if they did, it's essential to block or their special 2 will do immense damage in this early stage.
You do not have to do the battles in the same order.
You gain experience and credits for every fight you win, and reduced experience and no credits if you lose. While you generally get a larger amount of credits for the first time you complete a battle, you would often have to redo a battle to gain experience and credits to strengthen your team. It is difficult to win some fights without a team that meets their level at bare minimum, especially for new and inexperienced players.
Battle 7 contains the 1st boss battle against a super-powerful version of Green Lantern with 1030 damage and 1980 health, proving to be very tough to fight against, even more so if your device suffers from the ring construct graphical glitch. His heavy basic attacks deal 123 damage total and can knock off almost a third of your health (assuming same level) with just one combo. His special 1 is strong enough to knock off the majority of your health, so don't let him perform it! Power drain - especially multiple power drains from both Nightwing and Lex Luthor - will reduce his threat. Upon reaching 40% health, his passive activates, causing him to take halved damage for several seconds, so save your heavy hits.
Note that this version of Green Lantern is a red, or "boss" card, which not only gives him higher-than-possible stats but also access to all Green Lantern abilities, even those you have never encountered. Among them is Lead Rain, Regime Green Lantern's special 2, which has a high chance of stunning the target (aka you) if unblocked. If he does this with two bars of power, this would almost spell certain death.
The reward is worth the trouble though, granting more experience than any previous fights and a whopping 6660 power credits for the first completion.
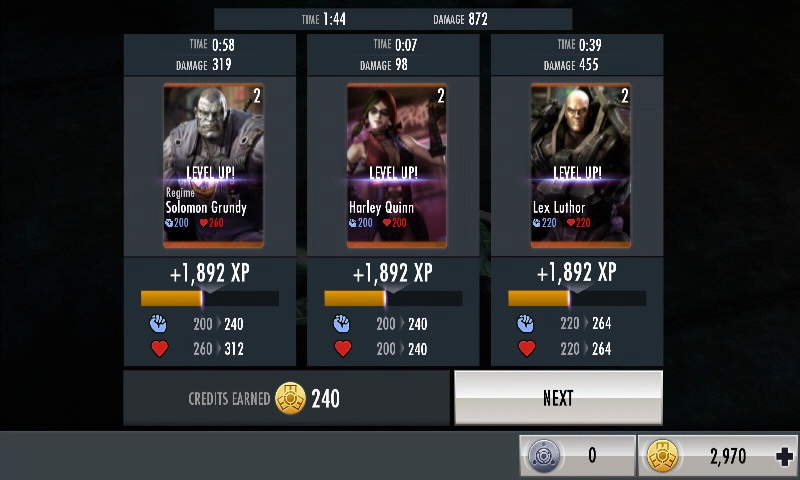
Finally, Bonus Battle 1: it gives even more experience (more than twice of the regular battles) and decent credits. While it costs 2 energy per fight, it is much faster in terms of number of fights. While it is longer than any previous fights, the mini-boss, Regime Solomon Grundy, is actually easier than Green Lantern, and beating it the first time awards 7540 credits and The Flash/Prime. This battle is also a good place to farm when starting out.
*TIP! Start from now play Survivor Mode once per day. Beat at least first 3 matches then cash out. You will be rewarded with over 1000 credits per fight, and chances for Nth Metal, a rare currency and Gear Set, the powerful gears.
Area 2
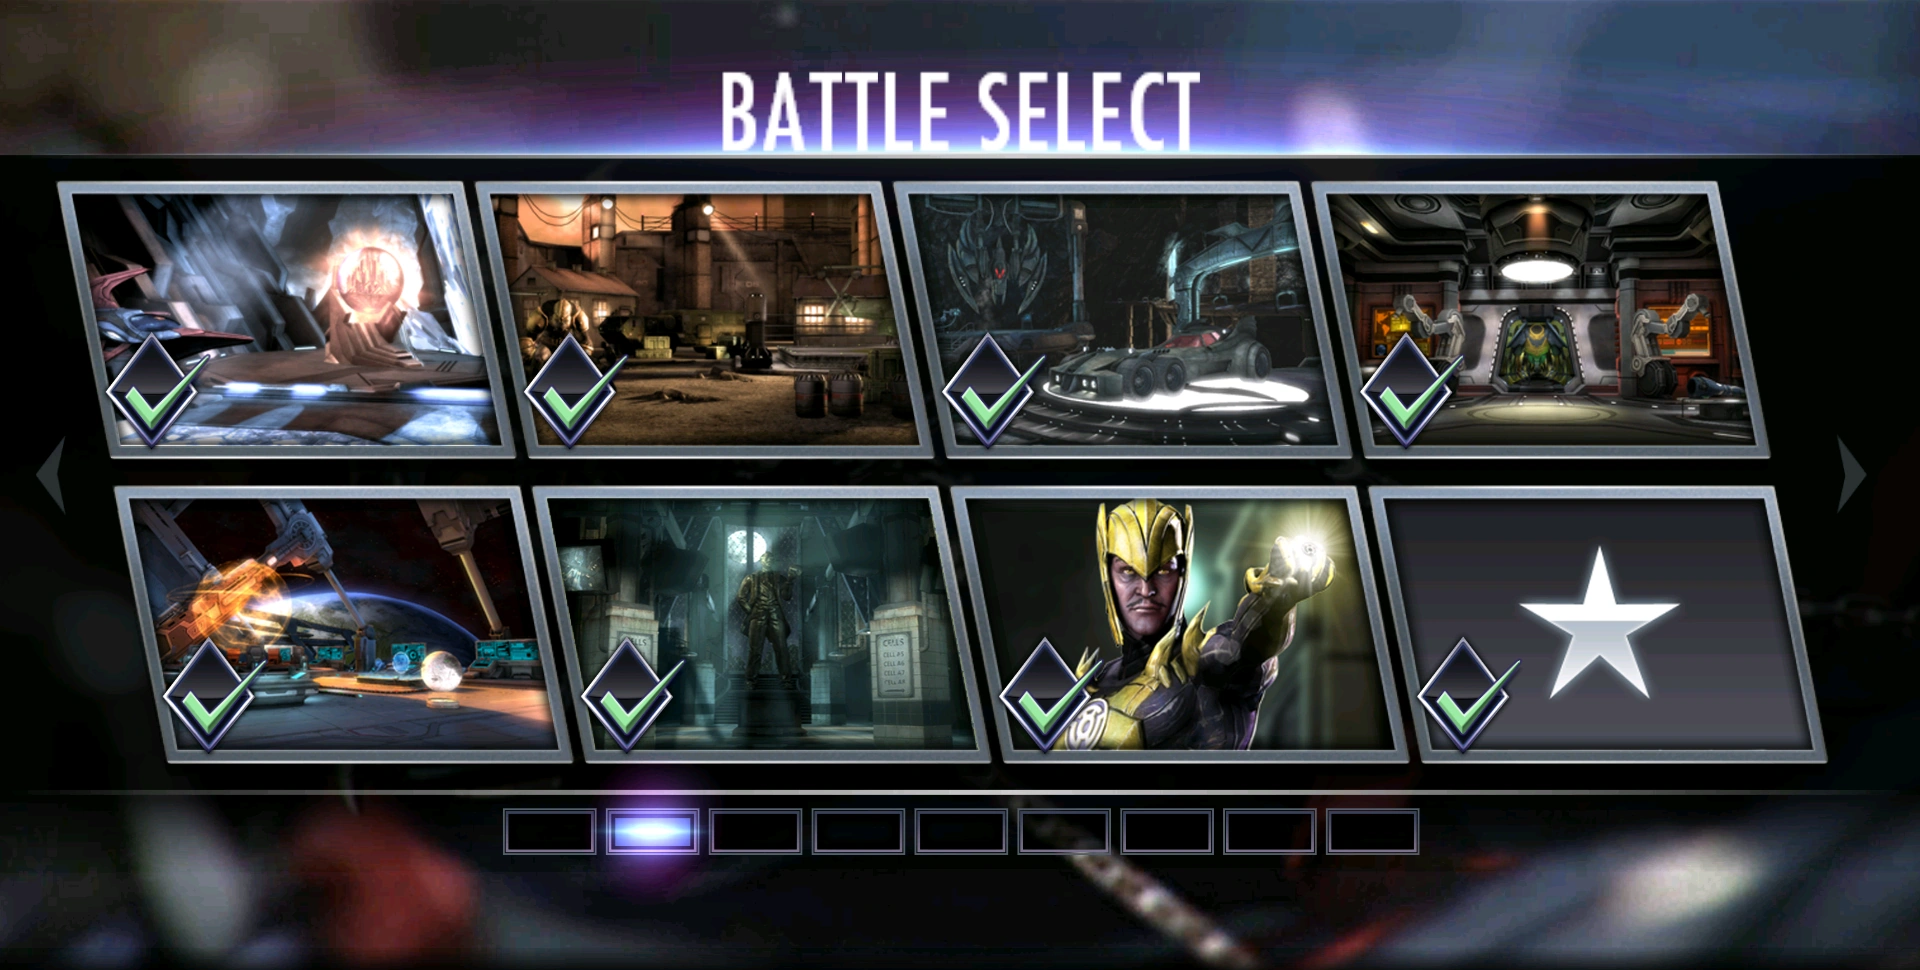
Area 2
Even the 1st battles of Area 2 are a real struggle with the bronze cards you start out with; it's advised to train up your characters by repeating battles in Area 1 first. You may want to purchase a silver card such as Green Lantern/Regime or buy Silver Booster Pack which gives you one random silver character. By this time you should be able to complete the first 2 battle of Challenge Mode and rewarded some free Bronze Booster Pack, with can strengthen your current bronze characters.
Another danger is Harley Quinn/Prime, who has an SP2 that allows her to deal unblockable damage or provide the team with a strong damage boost or heal. Try to avoid allowing her to generate two bars of power.
Battle 10 (the third battle in Area 2) is the first to have a handicap (other than "Power Surge", which gives both teams faster power generation), Dampening Field, which causes your team (but not the AI team) to generate power at a decreased rate, making the fight a tedious drag, which is the first roadblock in Area 2.
If you managed to get through that, the final fight in Battle 10 introduces silver cards - about three times as strong as their peers - stronger than the Boss Green Lantern and aided by another two bronze ones. Becoming a recurring fixture in Battle 11, their SP1 can potentially hit over 1000 damage, well over the maximum health of bronze cards you have without extensive training by repeating battles, and even their basic attack combo can deal around 200 damage.
Regime Bane is the first silver card encountered. His passive, Venom Rage, gives him 25% increased damage for 6 seconds when he falls under 40% health (signified by a red glow), allowing for a dangerous burst of damage. Solomon Grundy Regime is particularly useful here if you are given him (bronze cards are not worth purchasing at this stage); not only does he have very high base health for a bronze card, his passive allows him to instantly resurrect with 25% of his maximum health, negating any overran damage (e.g. if he only has 10 health left and takes a 1000 damage hit, it won't transfer to his regenerated 25% health), and both of Regime Bane's specials does one hit. His SP2, Venom Uppercut, can do over 2000 damage while his passive is active, and a large amount of damage can be absorbed with Grundy's passive.
While Catwoman, the first silver opponent in Battle 11, could be manageable, the following Regime Sinestro is not so forgiving - for his passive grants him 25% of his total power whenever you switch characters, making it impossible to share the damage or rotate your specials on him without taking way too much damage.
Battle 12 is surprisingly easier than 11 (remember that you don't have to follow the order) at first, but Cyborg/Regime shows up in the third fight, with an unprecedented health of over 3000.
Regime Sinestro becomes far less an issue if you use a strong character solo him without tag-out.
The next fight has Black Adam. His passive grants him a shield with three charges that causes you to take 50% damage of every hit you land on him. Additionally, it flinches you when you hit him with basic attacks. It's best to pop the shield with three basic attacks to minimize damage taken, but be careful not to tap/swipe too rapidly - the flinch may cause you to take his specials without the time to block it.
The final fight has Insurgency Lex Luthor. He has a lot of health (3675 including his passive) and he increases his teammates health by 25% as well, and his frequent power drains can be annoying. While his power drains don't do too much damage, his second special, Orbital Strike, can do over 3000 damage! Power drain is a great way of handling him. Thankfully, his accomplices are weak and easily defeated so you can focus on him quickly.
The last two battles of Battle 13 contains Knightfall Bane and Solomon Grundy/Prime.
The former's main danger comes in the form of his second special, Thundering Dropkick, which can also do over 3000 damage (in addition to looking and sounding cool), and that his passive, Venom Overdose, gives him vastly increased power generation for 6 seconds when he drops below 40% health. Avoid hitting him with basic attacks during this period - his power can rapidly fill and cause him to hit you with Thundering Dropkick unexpectedly.
The latter does little damage in comparison - his special 2, Swamp Hands, is a stun and deals only half damage - but he has a ton of health and his passive gives him half his health back when you first reduced his health to zero, and the battle has the regeneration handicap that heals him for a small amount every second. However, it should only take a couple special attacks to wear him down.
Battle 14 starts taking 3 bars of energy per fight, so you may have to wait longer between fights. In the first fight, you have to defeat The Joker; tag out if he uses his special 2, Laughing Gas - otherwise, it will deal additional damage over time and reduce your damage output by 20%. Additionally, the character who knocks him out will lose 30% of their maximum health.
At the end of the battle, you will finally meet the boss of area 2 and fear itself - Regime Sinestro. With a damage stat of 2349, he can potentially hit up to around 1500 with his special 1 and 4500 with his special 2. Regime Sinestro's passive gives him 25% of his total power, or 1.5 bars if you tag out and back in. His 5480 health also means it takes a long time for him to go down. Try teaming your strongest character with two "support" characters instead (like New 52 Green Lantern, which gives him/her a bit of health, and bronze Lex Luthor, who gives him a good amount of damage). With Lex's damage boost, it would go much quicker. Defeating this boss for the first time grants 11060 Power Credits, and will unlock area 3.
Bonus Battle 2 has the Radiation and Power Surge handicaps. Both teams have increased power generation, and you will lose 0.5% of your maximum health every second. Beating it for the first time gives you Sinestro/Prime (sadly not really relevant at this point) and a very nice 12,240 credits.
*TIP! Now you can beat the first 2 battle of Challenge Mode, which reward you with free Bronze Booster Pack and a good amount of credits. You should start playing Online Battle by now to collect gears, they are huge assets to your team, even the low-star ones. You should have a strong bronze team at this stage. Remember to always equip gears if possible. Gears make battle MUCH easier than which stated in this guide.
If you are lucky, Phantom Zone may start during this time. Take advance of this event to quickly build your roster. You may get enough Nth Metal (also from Online Battle and Survivor Mode) to purchase a Nth Metal Pack, which gives you one gold card, or even Nth Metal character! Nth metal character is very powerful, and if you have them, they can solo at least to the start of Area 6! The guide will presume that you don't have them for now.
Area 3
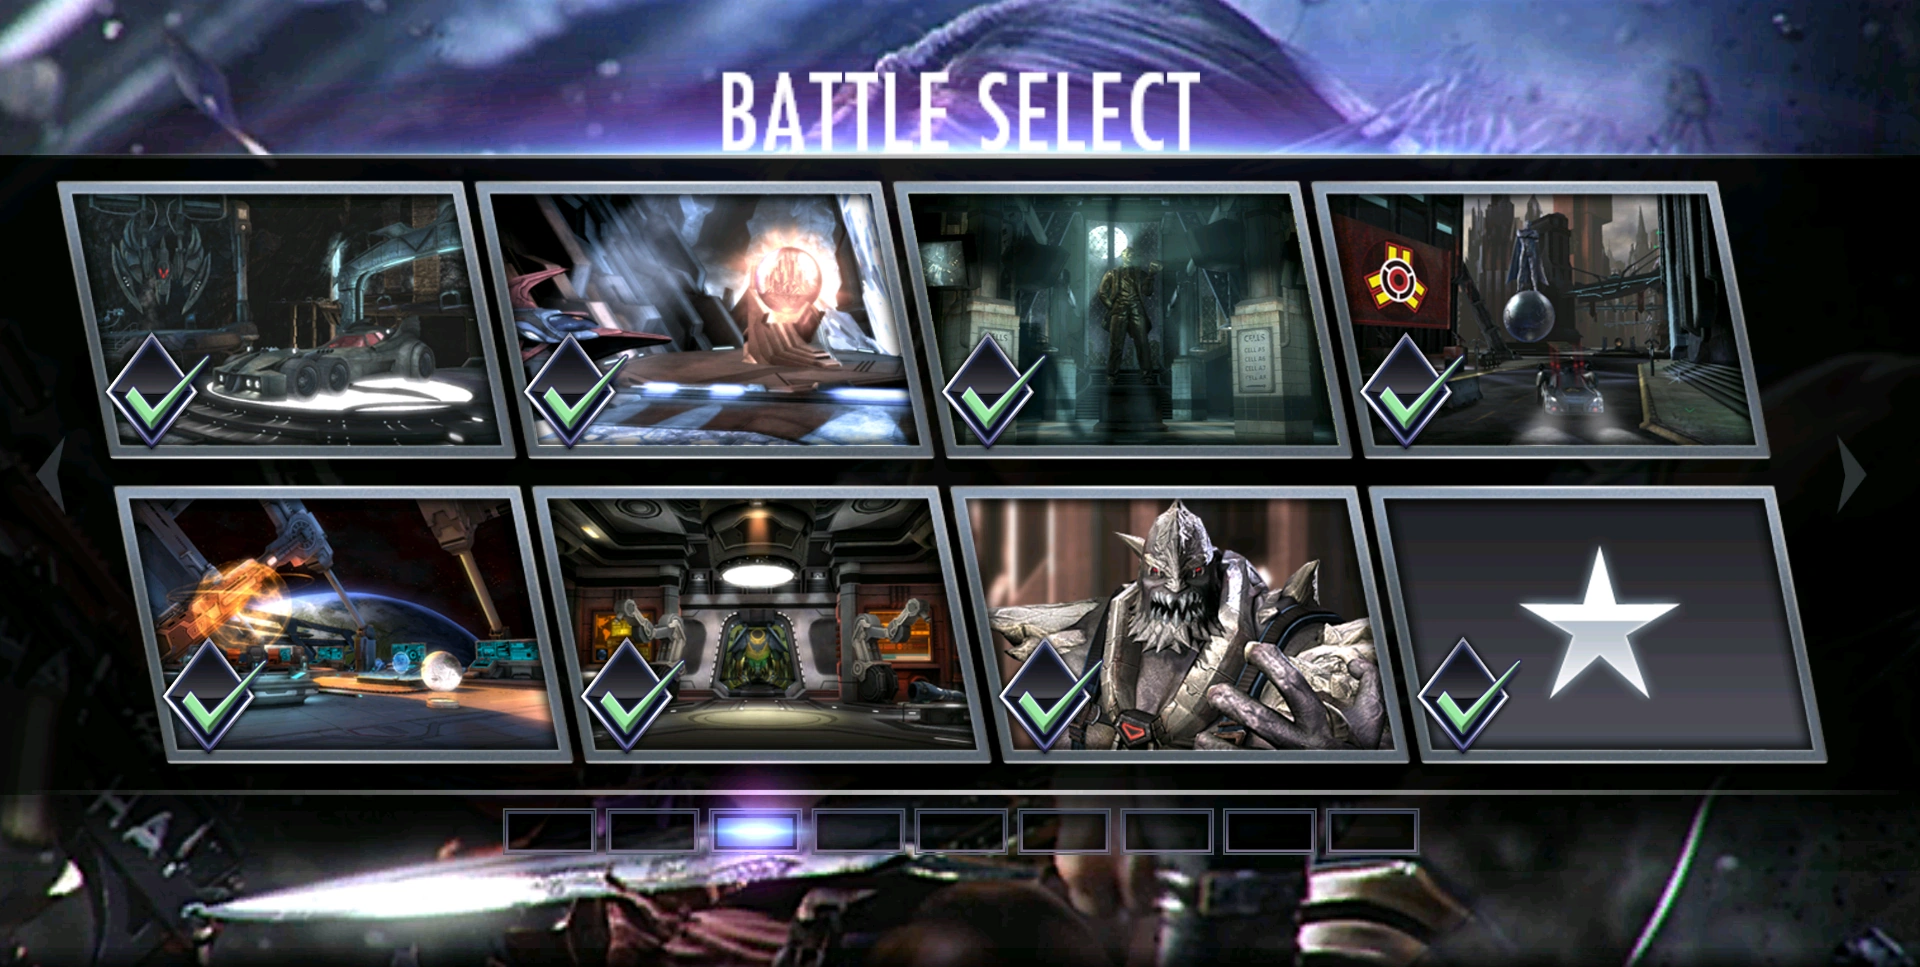
Area 3
Enemies would start to block more and more often. There are ways to avoid your specials being blocked (see the block page); but if you are a new player (and possible getting sore fingers already from your spam tapping), Super Moves are the way to go. Super Moves does a large amount of unblockable damage in one hit, so avoid using it when your opponent is already at low health (Way of the Bat can knock them out and spill over some damage to the next target)
By the time you reach the end of area 3, you should have at least 100,000 credits, including weekly rewards from Online Battle (more if you grind the previous battles and any other game mode). If you don't have any gold character, you can try your luck at the Gold Booster Pack for 100,000 credits. There are a great variety of cards to be obtained from this pack, from the cheap yet effective Regime Black Adam to the mighty yet impractical Shazam. The cards you receive from this pack will give you random and unique paths through middle game. Or you can even save for Doomsday/Prime, who can solo this area with ease even without promotion. If you are patient, Challenge Booster Pack is a great choice as you may have powerful gold from it (more grind, though).
You may start to see cards with the roman numerals "I" or "II" in the top left hand corner. For what that means, see Promotion.
Enemy teams will almost always include two silver cards with over 3000 and later even over 4000 health, and the final battle has all-silver teams. It's a great time to start training your team to level 20 if you haven't already (although it is possible, albeit difficult, to beat it at level ~10). Battle 8 (the first battle in area 2) is good for this purpose. If you have gold characters, however, level 20 isn't that necessary, as you can overwhelm your enemies with higher stats.
Battle 15 starts with Wonder Woman, a powerful silver card. The number of buffs can be seen under the health bar; she tends to block more often than other cards at this level, and her special 1 alone would do devastating damage if you allow her to reach three charges. Don't let her block, or you can drain her power (e.g. Lex Luthor or Nightwing's SP1).
Regime Doomsday is later in the battle - his next special is unblockable upon knockout blow, so don't let your characters die. If you lose a character, you're probably going to keep losing.
Battle 16 is all about fast power generation; the first fight contains both Knightfall Bane and Regime Cyborg. Regime Nightwing also shows up later.
Later, Solomon Grundy and Regime Flash may be tedious, as Grundy's passive gives him 6336 effective health and Regime Flash's passive improves his otherwise slow attack speed.
The last fight is the first full-silver team - Regime Nightwing, Regime Bane and Regime Green Lantern. This can get quite difficult: Regime Nightwing takes halved damage from basic attacks, his SP1 applies power drain, Regime Bane's passive gives him a lethal spike of damage and Regime Green Lantern gives him entire team significantly faster power generation. A good way to deal with this fight is for your strongest character to take Regime Nightwing's basic attacks until Nightwing reaches 1 bar, then tag in someone else to absorb his power drain (preferably someone with a power drain so they could drain him instead if he decides not to use his SP1 and prevent him from building to his SP2, Kali Fury).
Battle 17 has the "Chaos" handicap, which causes you to have no control of tagging in and out (they will tag in and out randomly). This can get very frustrating and luck-based, and power drain's effectiveness becomes more limited.
Battle 18 has the "random enemies" handicap: you can't see who your opponents until you enter the match, and they change every time. Finally, you face the most powerful version of Regime Bane you've ever faced: with 2553 damage and 4600 health, he is both difficult to take down and can potentially hit over 6000 with Venom Uppercut if his passive is active. His difficult can vary slightly depending on his random teammates.
Battle 20 has "Countdown": you only have 2:25 to defeat your opponents or you automatically lose. A slight hidden advantage of Super Moves is that the timer doesn't run during a super but it will run - a lot - during a special, but you really shouldn't take that long. The final fight has two silvers: Black Adam and Regime Flash, the latter of which can deal over 5000 damage with his special 2, Power Kick; Black Adam's special 2 does halved damage because it's a power drain (remember the previous notes on dealing with Black Adam).
Battle 21 only has 3 matches. The first and second shouldn't be extremely difficult with multiple gold super moves, but remember dealing with Harley Quinn in the second match (don't let her get two bars). Finally, you face Regime Doomsday, the first card with an abbreviated stat: 12k health. His damage isn't very high though; his SP1 doesn't hit over 2000 and he is alone. Just be careful not to lose any character to him or his next special will be unblockable. Beating this match for the first time yield 13,460 Power Credits and access to Area 4.
Bonus Battle 3 shouldn't be too much of an issue until you come across The Joker at elite 2 with 4264 damage and 8064 health. Aided by his teammates, even his SP1 can hit up to 3000! Once again, power drain is excellent in handling him. Also try not to let Insurgency Harley Quinn reach two bars: her SP2 will either allow her to deal unblockable damage, heal her whole team, or give them a damage boost - Joker's SP2 can hit up to almost 7000 if the boost is applied! Train your second gold card to level 20 and try to stall long enough for your golds to use their super moves or specials on him. Using basic attacks on The Joker will only give him more power.
Wonder Woman in the next battle is a bit of a milestone. With 3 stacks of her passive, her SP2 can hit up to 10000 damage and even her SP1 can easily hit over 3000. Thankfully, she has less health. Do not let her have 3 stacks and more than one power bar at any time.
The next fight is a bigger milestone - the first gold card, Regime Black Adam. His passive is similar to the silver Black Adam, but much more powerful: it will cause you to take 75% of the damage dealt from your first three hits (including super moves) on him when he tags in. However, if you hit him with your SP1, you take double damage! Be very careful even if you are using super moves, since even 75% of your super move can smack off 2/3 of your health bar.
Arkham Harley Quinn in the following fight can be a real pain: her special 2 can either do up to 4500 unblockable damage, heal her team or give them a deadly damage boost. Additionally, her passive gives her team 25% more maximum health (so she effectively has 10331 health herself).
Beating Bonus Battle 3 the first time awards you with Green Arrow/Prime (which is admittedly fairly useless as far as silver cards go) as well as 14910 Power Credits.
*TIP! Now spend time playing other Game Modes, especially Online Battle and Challenge Mode. Take advance of Phantom Zone events if possible. As usual, focus on gears.
Area 4

Area 4
To get through this area, you will likely need a solid gold team with 3 gold characters at a minimum of level 20 to use their Super Move, or a strong elite I gold card such as Doomsday/Prime to solo this area. Gold Booster Packs will give you the variety of gold characters you need - with 3 gold characters, even without promotions, you should be able to get into area 6.
One of the matches in Battle 24 include Superman/Regime. Previously, he is infamous for being able to knock out almost any non-promoted gold characters in one hit with his unblockable Heat Vision that can hit over 13000. However, an update halved Heat Vision's damage, making him much less threatening. Nevertheless, try not to allow him to use his specials during his passive (Super Strength: 50% more damage for 6 seconds when his health falls below 40%) via power drain.
The final boss of this area is Insurgency Batman with 5796 damage and 31k health. His special 1 can hit over 3000, but his very high health is what makes this fight tedious. It will likely take at least 4 Super Moves or even more with SP2 to take him down. Insurgency Joker, a common occurrence in Gold Booster Packs, is very useful here; after taking damage and unloading his super, he can be knocked out and this will instantly deal damage to the boss equal to 40% of his maximum health (over 12000 unavoidable damage), allowing Joker's defeat alone to pull his own weight in a team.
This boss version of Insurgency Batman is capable of using Lunge Kick as well as Way of the Bat (Prime Batman's special 2) with one power bar, although the damage is scaled down accordingly and they have slow animations and are thus easy to block. His passive allows him to do heavy basic attack damage on stunned opponents, but as the stun lasts for a very short time, and his Explosive Batarang is very slow and easily blocked to avoid the stun and does halved damage anyway, it is not that much of an issue.
Defeating him for the first time awards 16,860 Power Credits, 3 energy cards and access to area 5.
There are a some matches in the Bonus Battle 4 that could prove difficult, the fight against Doomsday in particular. Supported by his teammates, he effectively has 13k health, and his special 2 Earth Shake can hit over 9000 if unblocked. This is made far worse by the regeneration handicap, meaning that he gradually regains health, and his passive, which grants him half of his total health back when he knocks out an opponent. Try to coordinate at least two Super Moves (with at least level 30+ gold characters which you should have now by this point) and hit him in rapid succession when he tags in later in the match so he won't have the time to regenerate, and watch your own characters' health closely.
The last fight is not quite as hard, but could still be very annoying. It has the same regeneration as well as the countdown handicap, and all three opponents have ways to restore their health. Solomon Grundy instantly regains 50% of his maximum health on first knock out, Prison Superman regenerates 30% of his maximum health over 6 seconds when he falls under 40% for the first time, and Insurgency Harley Quinn has the same SP2 like all other Harleys, which can make her teammates much more dangerous (Prison Superman's SP2 Unstoppable can hit over 12000!) with her damage boost or drag the fight far too long than the timer would allow.
While he has a lot of health, Solomon Grundy has low damage. Using your best basic attacker to whittle him down quickly and help draw out Harley so she would be less likely to reach two bars.
Check the damage your specials or super do (multiply with other source of damage boost such as Batman's +25% damage bonus if applicable) and hit Prison Superman with one according to his health could help avoid his passive and make the match go faster, and maybe lean a bit toward the safe side. For example, if your super does 5000 damage, pop it when he is about half health.
Beating Bonus Battle 4 for the first time awards 17,600 Power Credits, 8 energy cards and Green Lantern/Regime - a powerful and versatile silver card.
*TIP! If you already have a (few) decent gold team(s), it's now time to beat the normal difficulty of Challenge Mode to collect new, more powerful gold cards.
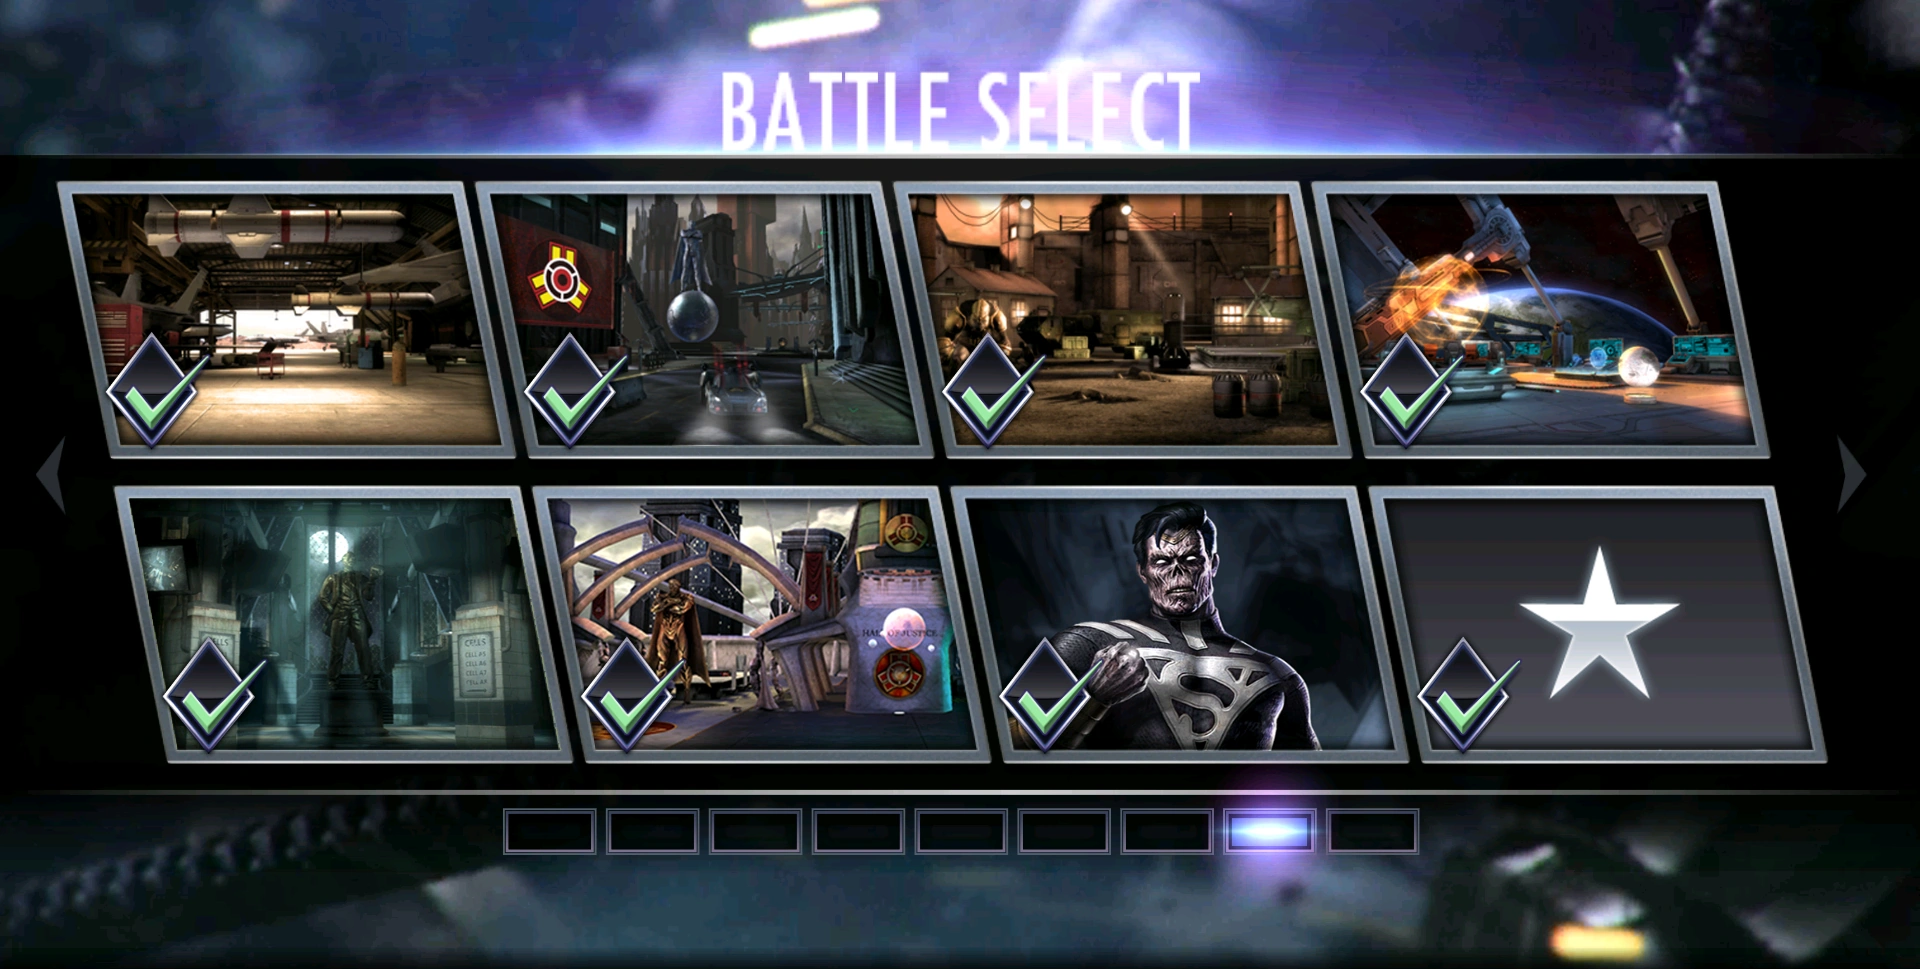
Area 5

Area 5
Most of area 5 will be extremely difficult without a team of 3 decent normal gold cards at high levels minimum.
In Battle 30, look out for Bane. His damage stat is deceptively low, but his passive gives him a 25% damage boost and causes all his basics and specials to crit for 10 seconds when he falls below 40% health, allowing his SP2, Lazarus Lockdown, to do over 12000 damage. Be very careful while his passive is active - simply use a good super move when he is about half health will help evading it entirely.
It is followed by another Doomsday; despite his lower health and the lack of handicaps, he is still very dangerous due to being teamed with Insurgency Harley; if she uses her team damage boost, his Earth Shake can do over 14000 damage - this is enough to one-hit kill some weaker level ~30 golds, even when blocked, and even stronger ones can easily be knocked out if they aren't at full health.
Battle 31 maybe one of the most frustratingly luck-based battle yet: Chaos (random tag in/out), regeneration (enemies regenerate health) and random enemies. The random tag makes it much harder to focus your damage while spreading enemy damage. The random enemies are stronger than ever and can contain rarely/never before seen gold cards like Killing Joke Joker (knocking him out grants his teammates full power) or Arkham Origins Deathstroke (chance of unblockable crit SP1). As the random enemies do not show up as cards with names, you can't look them up on the wiki if you haven't seen them before, so you are largely on your own.
At the very end of the battle, you have to walk blind into an disproportionately difficult fight, the hardest you have ever faced by a large margin. Do not be fooled by the level shown on the card, as the actual opponents are exponentially more powerful. Among the three, there is one hidden "super boss" - their exact stats varies as they are a random character, but their damage can range from about 15000 - 21000 while their health range from about 20000 to 34000 (constantly healed by ~0.8% of maximum every second). The boss can be one of a great number of different gold characters, including Lobo/Prime, Wonder Woman/600, Batman/Arkham Origins, Batgirl/Prime, Batman/Red Son, Superman/Red Son, Deathstroke/Arkham Origins, Raven/Regime, Doomsday/Prime, Superman/Prime, Green Lantern/John Stewart and The Flash/Elseworld. They are always the middle character shown in the portraits at the beginning of the match. The pages can help you understand what they do and how to fight them (for example, Arkham Origins Batman starts with two bars of power and can instantly use Winged Avenger to do ~40000 damage), but this fight is so absurdly difficult it is much better to just quit the battle, restart, and hope for a different boss - even the Prison Superman area boss fight is much easier than this hidden boss. While his health rivals and surpasses most hidden bosses, his damage is only about a third of them and he isn't aided by two more characters, which can additionally have powerful team passives to make the hidden boss even stronger (e.g. Lex Luthor/Krypto). Note that you need to complete all battles (except the bonus battle) on the page before the next page is unlocked - complete all the battles will give great first win bonuses to improve your roster before going back to this titanic struggle.
While uncommon, it is possible to not have a gold character as the super boss. It seems that it is possible for a silver character as the boss, which raises its stats to the other gold characters' levels, but far from as strong as a gold boss. Silver bosses include Catwoman/Prime and Doomsday/Regime.
Despite the end of Battle 32 advertises a hidden mini-boss, it is far easier than battle 31's boss, and indeed even less dangerous than Prison Superman. Beating the mini-boss for the first time awards 12,280 credits.
The beginning of Battle 33 is something of a breather level - the triplets of characters are fairly easy to defeat up till the triple Banes. They also give 1000+ power credits each and only requiring 2 bars of energy, making it an excellent place to grind for credits. Remember you can simply do the first three (easy) matches, exit, tap on a different battle which resets your process, then go back to the beginning of battle 33 repeated to rack up credits quickly. The second match (triple Flash) is especially easy, so you can use some of your weaker cards in it to save energy on your stronger cards.
At the end of Battle 35, you must defeat Prison Superman boss. He has a large amount of health (26k, about 34k with his passive), but his damage is manageable. Note that as a boss card, he can use Heat Vision or Freeze Breath (stops you from taking any action for a few seconds if not blocked) with 1 bar of power. Defeating him for the first time awards 22,260 power credits and 4 energy cards.
Bonus Battle 5 is the first battle to contain elited gold cards. It is much harder compared to previous bonus battles, and most importantly, you will find no unpromoted cards in this battle. Thus, it is recommended to play this battle after completing few battles in the next area (read about it for more details). The first battle is not very difficult as you will fight Insurgency Batman, however, do not let him stun you if you haven't forgotten. The next fight contains all regime cards: Bane, Black Adam and The Flash. Do not use SP1 (especially one or two hits) against Black Adam when his shield is active or you may lose almost 80% of your health. Similarly, you can deal the next two fights as they are not very hard if you are prepared.
The main difficulty comes from the fifth fight, as you will face Doomsday at Elite II with 10K damage and a gigantic 23K health, which is further amplified by his passive, giving him upto 46K health with two KO blows. So do not let him KO you to avoid his further destruction. Also avoid KOing Joker or you will lose your health, which can be advantageous to Doomsday. Bane in the next fight is not very hard as Doomsday, however, his SP2 combined with his passive can allow him to take out two of your teammates, so prevent him from using specials (like power drain) while his passive his active. The 7th fight is far easier than the previous two, so it is not much of an issue. The last fight is again the pain, as Regime Wonder Woman, at Elite II, is accompanied by two silver cards (unlike Doomsday or Bane who are accompanied by only one silver card). Although the three of them do not have synergy with each other, Wonder Woman's SP1 is the main threat, as she may perform it right after blocking your attack, and it will be difficult for you to block it. Power drain is necessary in this fight, as all of their threat comes from their specials.
Completing Bonus Battle 6 for the first time awards 23,500 power credits and Black Adam/Regime - a gold card with weak stats but with a powerful passive.
Area 6
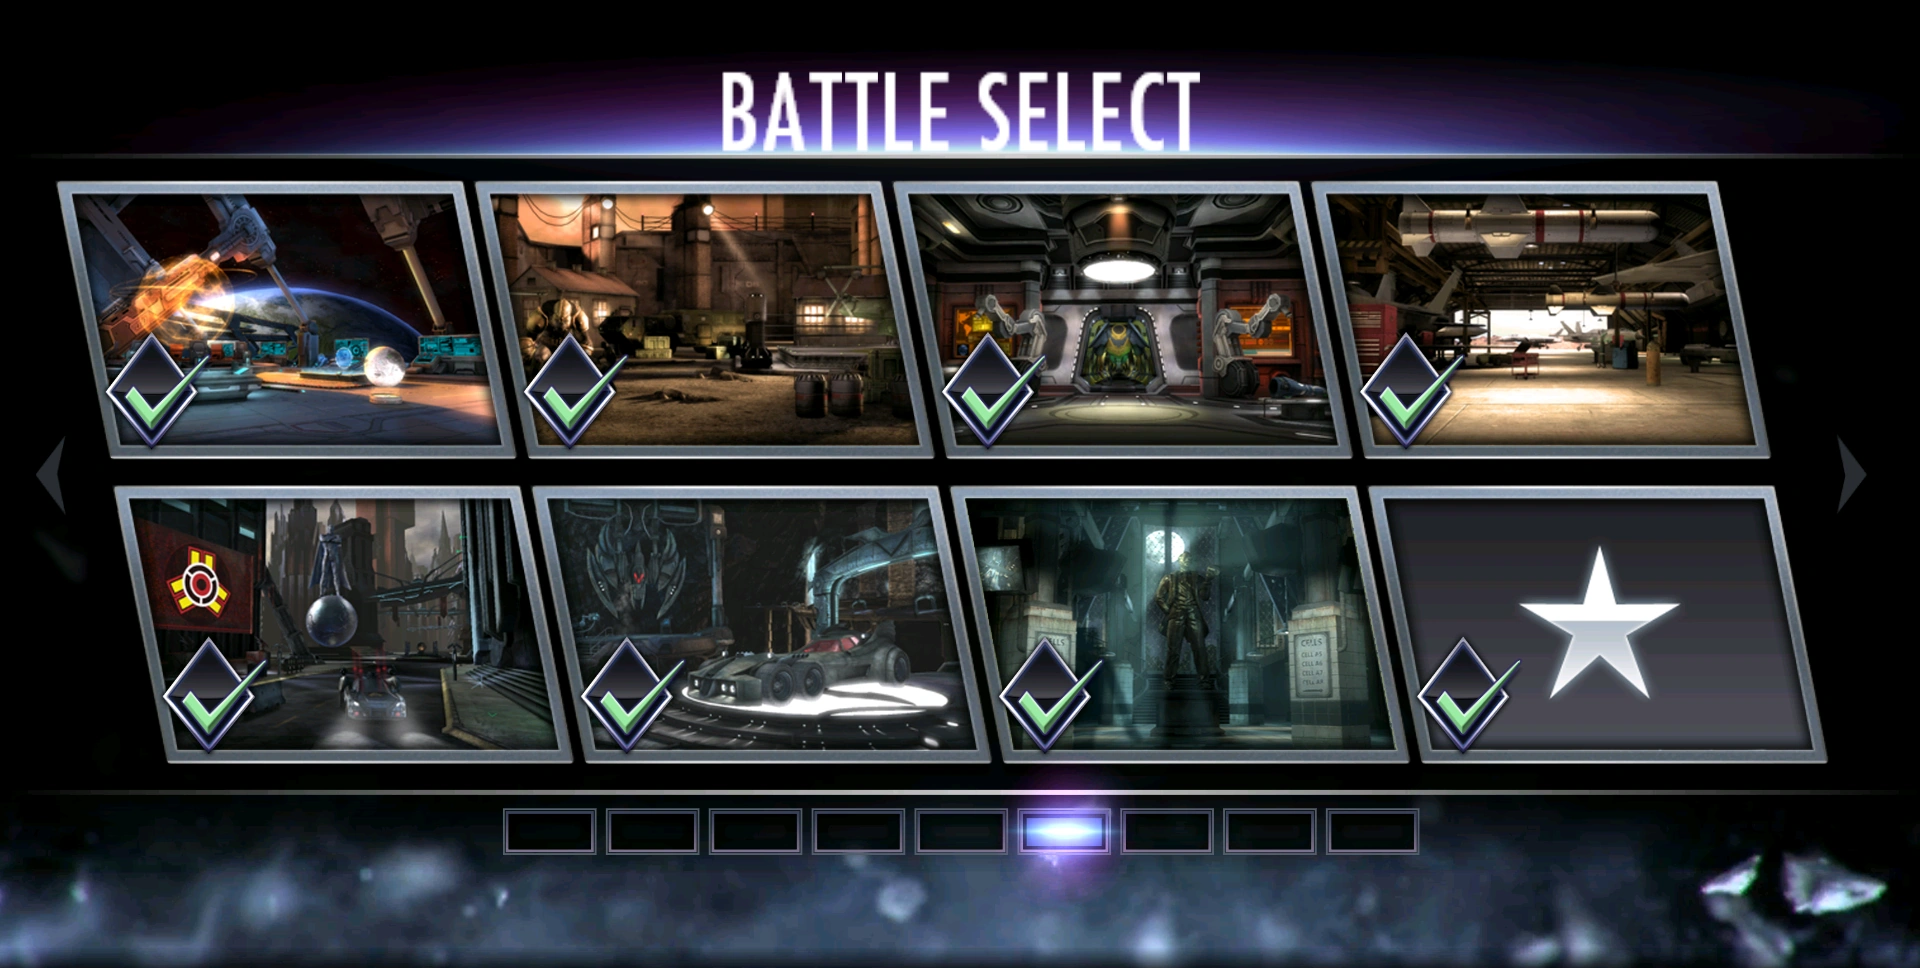

Area 6. Bonus Battle 6 is the best place to grind credits.
Area 6 is a unique stage of battles that does not follow the normal tradition sequence of battles from the earlier stages. Instead of a single boss fight after 2 teams of 3, it is a large slew of single, high powered boss cards. At this area, it is strongly recommended that you begin to elite your gold cards, as furiously leveling them up will not help at this point. This area is practically impossible at the end if you do not take this precaution.
Plain LV40 E0 gold cards can make it solo for some the first battle and maybe a bit of the second if you team up cards, but after that you really need to start to elite your golds (as mentioned above, the first battle of area 6 is a pretty comfortable difficulty, and is a great place for farming. Use this to your advantage when trying to elite golds).
Battle 36 is the first battle, and gives an interesting twist that distinguishes it from all of the single player stages you've gone through so far. You will face 2 cards each battle, one out of the two being a mini-boss. It is not very difficult for LV40 E0/E1 golds, and can pretty much make it solo for the first few fights. The Nightwing fight is slightly more challenging as they frequently power drain at almost every opportunity and are stronger, so it is recommended you have a decoy card (remember, it is not very hard for the first few fights. Do not worry about using up 1 slot). After that, the enemies start getting a bit more tough, so you should start teaming up golds now. By this area, you may notice many cards interrupt your attacks. One way to counter this is to swipe or tap before the match begins to get a head start (not fully fool-proof). It is possible to master this move yourself, but requires much practice and timing skills.
Battle 37 has the same basis, but the enemies have much stronger stats now. A LV40 E1 gold can still get through a couple of fights solo, but then you need to start to team with other golds (more fun option) or elite more. A good team at this stage are the Red Sons.
The first few enemies will average around 15k health and 7k damage. These won't be too hard for solo golds and are still quite comfortable difficulties. However, after that the enemies get noticeably more difficult and enduring. It is recommended you have at least 2 E1 golds to get through this stage comfortably and without too much problem.
Battle 38 gives an idea of the wave of bosses at the end. In this stage, you go against many single bosses at high health and attack.
Battle 39 takes us back to the mini-boss rush battles. The first 2 are quite easy, as you face a pretty decently strong silver and mediocre bronzes. However, after these 2, the enemies being to power up, and you get 2 battles with dual silvers each at 18k health. After this, you face Wonder Woman, with 20k health and a bronze Nightwing. Get prepared, because after this, the golds start coming in.
Battle 40 and 41 are seemingly twin stages, each with random enemies and many challenges to overcome. The first one includes countdown and dampening field (slower power gen.). Using a Red Son team with RSWW is the best choice, but if you do not have any Red Sons, that's okay. This fight is still manageable with a good team of golds. The great thing is that you have a chance of facing silvers or even bronzes, so don't be too freaked out about all the VL40 enemies.
Our second stage, Battle 41, includes countdown and chaos. A bit more annoying than the last, as chaos can cause many things to go wrong.
Battle 42 is the final stage of Area 6. You will be against a large slew of very high powered bosses, the first being Sinestro/Regime with a massive 54K health. This battle is quite tedious and long, and will require great endurance. You should have your golds at E2+ by now. After you face Sinestro, the next battle is Green Lantern, with only 27K. This fight is not as hard, and gives some time to cool down after you dealt with Sinestro. Enjoy it while it lasts, because after this is The Flash/Regime, with 50K health. But, that's not even halfway there, yet. There will be Doomsday/Regime with 67K health, with Black Adam/Regime having 110K health. For him, you MUST POWER DRAIN HIM before he uses his 1st special, because he MIGHT POWER DRAIN YOU. Completing this battle for the first time will grant you Black Adam/Regime, a low stat but useful passive character.
M'kay, 'ere we go, Bonus Battle 6. When you first glance at it, you may freeze in fear at the mirror match and the enemies that lay ahead. Do not worry, because the mirror match is actually quite easy if dealt with correctly. It is recommended you need to at least have a card at E5 (bronze cards are the easiest to promote) to match that of your "warped reflection", though its still possible to use lower level characters if you're using sufficient gears. The second match is a breeze if you don't face gold character. In the third match, watch out for Lobo/Prime - he has very high health and is immune to power drain. In the fourth match, defeat Black Adam/Regime quickly before he tags out, so he can't trigger his annoying lightning shields which reflect your attacks. The final match is the hardest, as you have to battle 3 boss characters at once. Those 3 characters despite having weak passives, can still punish players with their high stat. Don't let get stuned by Batman's SP1 or he will knock you out with his boosted basic attacks. When Superman/Prison start regenerating, defeat him quickly with everything you have, or even better, use a powerful one-hit special to knock him out immediately, bypassing his passive. Wonder Woman/Regime isn't a big threat since her passive grants her too little power to be useful and therefore, you should prioritize on defeating Batman and Superman. Beating Bonus Battle for the first time will reward you a free copy of Wonder Woman/Regime, which is pretty obsolete at this stage.
Now that you have completed this stage, you should start getting your golds to E7, because the last 3 areas is going to be a tougher battle without them. You should also collect The Master's Death Cart and The Ibistick gears from Online Battle or Nth Metal Pro Pack and Nth Metal Ultimate Pack, they could make boss fight much easier. The Master's Death Cart's tag-in attacks can apply DOT from The Ibistick (see each gear's page for more details) which deals damage based on health percentage, quickly drain massive amounts of health.
*TIP! Bonus Battle 6 is the easiest way to farm for Power Credits - one run will earn you a little over 20,000 Power Credits. So make sure you have lots of strong characters to be able to farm lots of Credits in a small amount of time. That will give you enormous credits to strengthen your collection.*
You are also recommended to play Online Battle frequently. Beside for collecting gears, you will also have opportunities to battle against many different characters and learn how to counter them. You also can see other players' gear setups and apply that to your team too.
Since now, gear is a must to advance through the remaining areas. This guide will no longer aim at new players. You should have spent a fair amount of time in other Game Modes for grinding by now.
Area 7

Area 7
The third to the last page in the game! Feels great, doesn't it? Well, that won't last too long. The enemies are REALLY powering up now, and many stages will have Challenges. Some say they don't, but they pop up in the middle, so pay attention. EIII gold teams or above are recommended.
Battle 43 has Regeneration Challenge, so defeat the enemies quickly. The only dangerous enemies are Green Lantern/Regime in the first fight, who grants power boost to the entire team; and Cyborg/Regime in the 4th fight, who has a bugged passive that gain power really fast, so watch out of their specials.
Battle 44 is a breeze: the Life Drain handicap is push-over, and enemy teams don't have much synergy together.
The next is Battle 45, which consists of Dampening Field Challenge. This battle is pretty beside Green Lantern/John Stewart and The Joker/The Killing Joke, who may mess up your strategy. Harley Quinn/Arkham and Harley Quinn/Animated can heal their teams with SP2, so you should take care of them too.
The Half-a-Hero Challenge in Battle 46 is pretty annoying, but you can just overwhelm your opponents with basic attacks or gears (and stats too, if your teams are that strong). Power Drain is recommended since enemy teams here can gain a lot of power with Batgirl/Prime, Wonder Woman/600, Wonder Woman/Red Son and The Joker/The Killing Joke.
Battle 47 has both Chaos and Regeneration Challenges in the 4th fight so be careful. Enemy teams aren't special beside the annoying Green Lantern/John Stewart so just breeze through them. The last fight also has Chaos and Countdown as well, and Doomsday/Prime is a threat if you let him knock out your characters. Remember to use a balanced team (as Chaos may tag your weak characters against Doomsday). And you can, deal as much damage as possible to Black Adam/Regime before he tags out to prevents his reflect.
The fourth and last fights of Battle 48 have SP2 and Super disabled, so rely on basic attacks and SP1 to win. In the last fight, Hawkgirl/Prime can snare you and Zod/Prime will gain damage boost if his teammates are KO'd, so defeat Zod quickly. Lobo/Prime is immune to power drain, and such, don't feed him too much power with your attacks.
Now is the Battle 49, with various Challenges waiting for you. The Radiation in the 4th match has great (and dangerous) synergy with Batman/Blackest Night's passive. The sixth fight is even harder, enemy team starts with 1 bar of power thanks to Batgirl/Prime, and also gain 30% more damage and power boost thanks to Wonder Woman/600, not to mention that you also gain power at slower rate! Power drain is crucial in this fight, otherwise they will flood you with special attacks. And the biggest obstacle is here, Arkham Origins Batman boss, who starts with 251K health! His Winged Avenger can instantly KO'd one of your teammates. Powerful teams like Red Son, Arkham, Suicide Squad, and other useful characters who have great synergy with each other would work. One useful strategy is, if you're fortunate enough to have a character with a strong combo ender like The Arkham Knight, Deadshot, or Harley Quinn/Arkham Knight, you can equip them with Ra's Al Ghul's Scimitar and instantly start power draining Batman so he cannot use an SP2. This can also work with strong power drain characters like Nightwing and Lex Luthor so they start with 1 bar of power and can power drain Batman right at the start of the battle. The Mother Box's power drain at the beginning of the match and Raven/Rebirth's power steal can also be immense helps. Superman/Injustice 2, Reverse Flash, Wally West/Rebirth and Batman/Dawn of Justice are also excellent counters as they can potentially evade all of the damage from Winged Avenger and Batman & Wally West also have useful counter attacks as well. A beginner-friendly strategy is about using Black Adam/Regime, who can reflect damage on tag-in. You only need E0 Black Adam, put him in the second/third slot then tag him in immediately, Batman will use a special and Black Adam can reflect the damage back, dealing tons of damage which can remove half or even most of his health. Then finish him will any attack you got. Fourth World Set can give Black Adam 1 resurrect, so he can tag out then tag in back to reflect even more damage.
Bonus Battle 7 is pretty hard. You will see battles with different and challenging Handicaps, with possibly one of the hardest battle being the 4th match with both Lex Luthors and Arkham Harley as their health passives and Harley's healing with the Countdown challenge make them very notorious. The enemy team in the 6th match also has MASSIVE power gain and your SP2 & Super are disabled, so don't use multi-hit SP1 if possible. Batman/Arkham Origins in the 10th match is also a threat, and just treat him like the boss in Battle 49. Again, great teams will work. At the end, there is a mirror match, this time at EVII and level 50. This one is not hard compared to the rest of this battle. Just deal with it like the first fight of Bonus Battle 6. You have gears to overwhelm them.
*TIP! Bonus Battle 7 is the fastest and easiest way to level up characters when they reached Level 46, and also Levels 50 to 54 (or 55?) when they attained Elite X promotion...unless you can deal with INSANELY POWERED-UP ELITE X LEVEL 60 BOSS CHARACTERS in Bonus Battle 8....*
Area 8

Area 8. Bonus Battle 8 is the best place to grind XP.
YOU'RE ALMOST THERE! Make sure that you have your strongest characters leveled up to 50 and promoted as much as possible to at least EVII, the strongest gears you have are maxed or at least evolved already, and if possible, Crit Chance and Crit Damage augmented because you will be dealing with characters that technically have higher damage and health stats than those stated in their card, and have insanely strong synergy with each other (watch out for the notorious Red Son and Arkham teams!), add to that the handicaps, specifically CHAOS, COUNTDOWN and DISABLED SPECIALS AND/OR SUPER, which make battles in this area excruciatingly and insanely difficult to deal with and pass through.
The characters on Battles 50, 51 and 52 are promoted to EVII, EVIII and EIX, respectively, but starting on Battle 53 onwards, ALL CHARACTERS ARE ELITE X (not to mention that starting at this point and on the following battles, characters are gradually rocketing past Level 50), and upon reaching the last fight on Battle 55 up to the very last fight on Bonus Battle 8, ALL CHARACTERS ARE ELITE X AND LEVEL 60! An unblocked SP1 which can deal more than 100K of damage or even a blocked SP2 spells instant death to your unlucky strongest character or even your whole team!
Watch out especially on Battle 54 for the Arkham team composed of Bane/Arkham Origins, The Joker/Arkham Origins and Harley Quinn/Arkham Knight due to the very strong synergy with each other - if you managed to knock-out Bane, it's very unlikely that a bar of power is not granted to Joker and Harley; if you managed to finish off The Joker, however, Harley Quinn is granted with 3 bars of power! Do not be even relieved when you have a planned victory on your hand - the Chaos handicap can disrupt your strategy and foil your plans completely, and not to mention you will face this team TWICE!
On Battle 55, aside from the Radiation on the 1st fight, it seems that there are no handicaps, and some teams almost or don't even have synergy with each other, so you can plan a strategy and time to rejoice? NO! On the 4th fight (composed of Aquaman/Prime, Aquaman/Flashpoint and Aquaman/Injustice 2) and last fight (composed of the three Dawn of Justice characters) of Battle 55, although there is neither Chaos nor Regeneration, it will seem almost impossible to pass through these with DISABLED SPECIAL 2 AND SUPER getting on your way - add to that a COUNTDOWN on the last fight! With this, it's probably better to rely on characters with a one-hit nuke on SP1, particularly Bane/Luchador and Batgirl/Cassandra Cain, when geared with the Cloak of Destiny, League of Assassins Adept Knives and LexCorp Gauntlets V2. The fight against 3 Dawn of Justice characters is one of the hardest fight in the game, mostly because of Batman/Dawn of Justice. Killer Frost/Prime is a great option to limit their offensive power, as one or two specials can knock your characters out. Try to use strong basic attackers such as Batman/Flashpoint to get rid of enemy Batman. If your basic attackers' can't match their stats, you can use The Master's Death Cart + The Ibistick combo, with can severely wound Batman, though luck is needed as Batman can evade specials. Raven/Prime's health swaps are useful in defeating Batman too. Bane/Luchador and The Flash/Earth 2 can STUN him on tag-in, making him UNABLE to evade your specials!. Play cautiously and block frequently to win this lethal fight.
The Battle 56 is a series of boss battles with countdown handicap. Don't be afraid of it, as the timer lasts for 3 minutes for each fight, more than enough to finish the match if you don't play slow. The first fight against Suicide Squad team isn't much a challenge if you defeat Deadshot/Suicide Squad quickly and prevent Harley Quinn/Suicide Squad from performing her SP2 (give power trick). The next fight against Batman/Dawn of Justice is a real challenge, though it isn't as hard as the 3 Dawn of Justice characters on Battle 55 since you only have to fight Batman. Tantu Totem can refund power if Batman evade your specials if you have it. Use the same strategy as the previous encounter and you will win. The next two fights are push over, Catwoman/Ame-Comi and Killer Croc/Arkham aren't dangerous. Killer Croc's armor can be annoying but with aggressive offense, you will probably win. Raven/Teen Titans is the same as those two, except she has more offensive ability, so deal with her cautiously. Against Hal Jordan/Yellow Lantern, don't tag often and you should be fine. Nightwing/Batman Ninja can completely ruin his passive if you want, but he may be hard to get. The 7th fight against Wally West/Rebirth should be treated as same as Batman/Dawn of Justice, because Wally West CANNOT evade special attacks when being stunned! Finally, Superman/Blackest Night boss can still be defeated quickly with The Master's Death Cart + The Ibistick combo. If you don't have these gear, The Joker/Insurgency from store can remove 40% of this boss' health for you (be noted that Superman/Blackest Night can heal 10% of his heal for each knocked out opponent so try not to lose the second character). With aggressive offense, Superman will fall eventually.
Bonus Battle 8 has the Radiation handicap, but don't rush as enemies aren't that strong. Beside the "Justice League" team and the Red Son duo, enemy teams don't have much synergy here and should be treated as normal battle. Beating it for the first time will reward Killer Croc/Arkham.
*TIP! Bonus Battle 8 is the best place to grind credits and XP in the game. But because of its difficulty compared to Bonus 6 & 7, the latter 2 are often the better places to grind if you can't breeze through Bonus 8 easily. Bonus 9 gives more XP and fewer credits, but is MUCH harder than Bonus 8, though*
Area 9


Area 9, the final and also the hardest stage.
THE LAST AREA! You now have to face the strongest enemies (including Nth Metal characters!) with several of challenging handicaps. Make sure to have all of your best gears maxed and strong level 50 (or above) characters highly promoted. Battles have to be beaten with advanced strategies. Due to its difficulty, this will be the longest section of this guide - Feel excited yet?
Battle 57 has the Life Drain challenge on some matches. Overall, this battle isn't hard compared to previous battles. The most difficult fight is probably against Raven/Prime, Reverse Flash and Catwoman/Arkham Knight, as all of them are strong character with very annoying passives. Knock out Raven with strong one-hit attacks after wounding her to prevent the health swap. Reverse Flash's regenerations can be baited with area effect specials when he's tagging out. Some notable sources of area effect special damage are The Master's Death Cart, Fourth World Godly Mace, League of Assassins Adept Knives,Lord Joker/Batman Ninja, The Arkham Knight/Arkham Knight, etc. Catwoman's specials should be prevented either with power drain, special disable effect or Killer Frost/Prime's passive. You should also watch out for Scorpion/Mortal Kombat X in the last fight, as at EX, he has ridiculously high amount of health and very powerful DOT that can crit! Thankfully, his two other teammates won't give you much trouble beside their high stats. Darkseid/Prime has a useless passive, while Bane/Arkham Origins can only give power to himself as there is no other Arkham character left. Both have slow basic combos and you can interrupt Darkseid's both light and heavy combos with special attacks!
Battle 58 has the Countdown and Radiation on 3 matches (they both appear TOGETHER on first, third and final matches), forcing you to finish these matches quickly. The second match consists of Aquaman/Injustice 2 and Raven/Prime so be careful if you play with DOTs. Try to put Enchantress Companion Card EVOLVED on your DOT-user to lock Aquaman's specials until the DOTs expire. The final match against the Arkham team is pretty challenging, especially Catwoman/Arkham Knight. She's in the first slot so you can nuke her right after the match started with characters and gears like Batman/Arkham Origins, Batgirl/Prime or Tantu Totem to avoid her dangerous DOT and also preventing Bane/Arkham Origins from giving her more power. If you can, don't deal too much damage to Bane if his teammates are still alive but nuke The Arkham Knight/Arkham Knight instead. The Arkham Knight's SP2 can damage your entire team so don't let Bane give him more power. And you have to "nuke" him and Catwoman quickly because of the Radiation and Countdown. The Flash/Blackest Night is a great choice in this fight, especially with his Blackest Night teammates, and even at low rank. Let Catwoman use her special attacks on Flash and rapidly gain health and power. Use specials to get rid of two other enemies, and save Catwoman for last. 3 minutes is more than enough to finish this fight with this strategy, especially with strong gears.
The next battle, Battle 59, is especially difficult with strong enemy teams and the introduction of the Broken Alliance 2 and 1 handicaps on 3 fight (1st, 4th and last fights), which limit your playable characters of your team to 2 and 1 respectively, and Broken Alliance 1 is by far the HARDEST Challenge ever!. Pick your team wisely, the "dead slots" should be saved for support characters whose passives are still active when they're KO, while the "alive" ones should be for your main damage dealers, who can solo the fight. Some great characters to take part in those battles are Batman/Batman Ninja, Jessica Cruz/Rebirth and Batman/Flashpoint. Avoid tag-team strategy because of the limited amounts of characters. The first fight is pretty brutal if Batman/Arkham Origins decides to nuke you immediately with his SP2, so you'd better drain those power with Mother Box or Raven/Rebirth, or block it with LexCorp Helmet V2 or Astro-Harness. Jessica Cruz is another threat to your team with her 6-hit, stunning combo ender, so remember to BLOCK. The second fight is a bit annoying as your enemies can heal, and Raven/Rebirth can steal your power, but with strong gears and good synergy team you can win this fight easily. However, the third match against Blackest Night team is very challenging thanks to Flash and Hawkgirl, 2 core members of the "nightmare" team feared by almost all players in MP. DON'T USE DOT or you will feed them insane amounts of health and power. Flash can evade basic attacks and even revive once with full health, so prepare to face that. Batman/Flashpoint's special attacks can shut down those annoying resurrections and inflict huge crit damage to them. Superman/Blackest Night's necrotic damage can effectively reduce Flash's max health with his specials. Area effect specials can greatly harm them, especially The Arkham Knight/Arkham Knight, Deadshot/Arkham Origins or Bane/Luchador. Then you can use multi-hit specials to finish them off during their resurrections.
The 4th and 5th fights aren't hard beside the handicap and Batman/Dawn of Justice as the enemy teams don't have good synergies together. The 6th match can be either hard or medium depending on which WayneTech boosts Batman/Arkham Knight chooses, with Power Added is probably the most dangerous buff. Wally West/Rebirth is as annoying as ever, deal with him same to Batman/Dawn of Justice - basic attacks and AoE specials work wonder. On the 7th match, Aquaman/Flashpoint and Scorpion/Klassic can reflect your specials, so make sure to get rid of the Water Shield with a weak special or just use strong basic attacks. Now, the real challenge of this battle, the 8th and also last fight, showed up. With the Broken Alliance 1 Challenge, you have to SOLO this fight! Thankfully the enemy team doesn't have good synergy together, but Sinestro/Antimatter is still a force to reckon because of his power drain on SP1. A good, cheap, easy-to-have team (all members are avilable in store and Challenge Booster Pack) to use is the Green Lantern team, which centers around Jessica Cruz/Rebirth. The second and third slots should be used for Green Lantern/John Stewart and Green Lantern/Regime. Equip Jessica with Tantu Totem and either:
- LexCorp Helmet V2 and LexCorp Chest Armor V2: Use a combo ender on Sinestro to give him a bar of power. Let him use SP1 and she will have 2 bars of power. Now use SP2 to knock him out. Then your power is refunded, keep bombarding enemies with your SP2. The saw blade can apply DOT from the Helmet, and its crit damage boost work well with Totem's crit chance on specials and Armor's crit basic attacks. The Armor can heal you constantly. If your SP2 can't knock out the enemy (then power is refunded), attack with the boosted crit light combo.
- Ra's al Ghul's Scimitar and any SP2 gear (preferable with crit): Gain one more bar of power with light combo then bombard with SP2. Got power refunded - repeat.
Batman/Batman Ninja can solo this fight too. Equip him with Tantu Totem, Cloak of Destiny and Overpowered 5-U-93-R. His teammates should be Batgirl/Prime and any third character. Use a basic combo on Sinestro to gain power from crit damage. The power drain will help disable his SP1. Now use your SP2 as soon as you have enough power. At E7 level 50, his non-crit SP2 can deal about 180000 at max with 200% swipe. The Cloak of Destiny will further boost that damage, ensuring a knock out with each unblocked SP2, even if you can't achieve 200% on the mini-game. Now as Totem will refund your power, slash the remain enemies on your path like a samurai!
Battle 60 consists of one Mini-Boss per match, but they're just normal enemies with slightly boosted stats, so at this stage you shouldn't have any serious trouble in beating them. The only problem is the Chaos + Regeneration combo, backed with the Arkham duo, Killer Croc and Deadshot on the 4th match. Chaos will certainly ruin your strategy so play aggressively, especially against Deadshot as his power drain and area effect attacks can cause a lot of trouble. Some other notorious enemies to watch out are Batgirl/Arkham Knight (unblockable specials), Batman/Dawn of Justice and Wally West (special attack evasion), Batman/Arkham Knight (his starting power can NUKE you, usually leading to an instant death, especially he's the Mini-Boss of the last fight!) and Jessica Cruz (annoying combo ender).
Lord Joker/Batman Ninja and his gunners welcome you to Battle 61! All enemies can use area effect specials thanks to Joker, especially Deadshot/Arkham Origins who already has AoE specials and combo enders. Quickly defeat them and remember to BLOCK their specials. Brandished Ninjato can make this fight easier with its AoE damage absorption. Power drain is useful as usual. On the second fight, be careful against Batgirl/Arkham Knight as she can rescue Killer Croc/Arkham once, so defeat her first if you can. Enemy Batman/Flashpoint hits like a kitten without crit. Your SP2 and Super disabled on the 4th match, and Batman/Gaslight can cause your basic attacks to miss, so make sure you have a strong SP1 specialist on your team (RAGE SLAM!!!). Next 3 fights don't have any handicap, and the enemy teams lack of synergies together. Batman/Batman Ninja and Superman/Injustice 2 are the only ones worth mentioning. The rest aren't that hard if you are aware of their passives (well, we meet the same old Batman/Dawn of Justice, AGAIN). The final fight against Suicide Squad team is pretty challenging, not because of the team itself but because of the SP2 and Super disabled. There's also countdown here, despite the description (why, NetherRealm?). Without Deadshot, the enemy team shouldn't be a threat to you. Eliminate them with your strong SP1 or basic attacks (Deathstroke/Flashpoint has both, if you have him) to end the match.
The final match of Battle 62 is bugged, the game will crash if you battle it, so currently that battle can't be beaten in 3.4 version. This guide will skip that battle for now.
Now, the BIGGEST CHALLENGE, Battle 63. A series of extremely powerful bosses with Countdown on your head. The warm up with Blackest Night team is pretty tough as Flash will resurrect with full health. All enemies can perform unblockable attacks, so you'd better end this nightmare quickly rather than play defensively (Oh, don't use DOT, if you forgot about Flash). Starting now, DON'T believe bosses' listed stats. They ALL have over one MILLION health! Now turn back to Overview and read about how to deal with bosses, you can't fight toe to toe with those bosses due to their stats. Those strategies will be the default damage dealing methods of the remaining fights if there isn't any special note. Harley Quinn/Suicide Squad boss is pretty easy with the normal DOT strategy. Without teammates, she basically passive-less. Superman/New 52, however, is a monster. Don't feed him much power or you will regret. Don't talk about his basic attack, but his SP2, even when blocked, can deal enough damage to knock out an EX level 60 characters! So power drain him, or disable his specials. The Joker Unhinged/Suicide Squad is another push-over just like Harley. Use the same strategy to win.
Batman/Gaslight boss is one of the hardest boss if you rely on The Master's Death Cart for boss battles. His passive will nullify all tag-in effects, including some common boss-killing ones like The Master's Death Cart or Batgirl/Cassandra Cain. His bleed on SP1 is lethal, as he has very high damage and you can't block DOT. So how to beat him quickly? The best answer is, again, our heroine, Jessica Cruz/Rebirth! In a full Green Lantern team, her saw blade hits on unblocked SP2 can apply DOT from gear multiple times, and its bleed effect can further enchant that. With The Ibistick, an unblocked SP2 can leave Batman at 1 HP! Equip Jessica with Ibistick and any gears that can give your power quickly like Ra's al Ghul's Scimitar and Heart of Darkness (Astro-Harness can be used too, just let Batman hit you to gain power during the Invulnerability). Her teammates should be Green Lantern/Regime (a silver card, which is easy to have) and another Green Lantern, preferable John Stewart. Now fight until you have 2 bars of power, then burn Batman with your SP2! Jessica at any rank (even E0) can use this strategy, provided that she can survive before her SP2 either by Invulnerability or attacking aggressively, so a copy of her (and John Stewart too if you don't have him) from Challenge Booster Pack is enough. Apply the same strategy to Deadshot/Suicide Squad and Batman/Batman Ninja bosses if you like, though you could use the normal strategy instead. Keep in mind that Batman will reduce all received damage until you have one character left, so the normal strategy may take longer time, while Jessica still only need one SP2 to get the job done.
And now, the final boss, Catwoman/Batman Ninja, backed with her Batman Ninja teammates, Nightwing and Batman, creating a powerful team with great synergy! The two metal cards are evolved, their tag-in can drain your power, and Catwoman will be saved by both Nightwing and Batman, so focus your damage on them if you can. Watch out for Catwoman, her basic attacks gain boosted damage and will drain ALL of your power during her RAGE. The LexCorp Set's power drain reversion can exploit the massive power drain on this match, turning this fight into a casual playthrough. Some examples are:
- Sinestro/Antimatter: Equip him with LexCorp Gauntlets V2, LexCorp Helmet V2 and a good gear (League of Assassins Adept Knives is the best choice). Fight until you gain a bar of power, then use SP1. Enemy will have to tag-out, next one tag-in, drain your power, but hey, it gives power instead! Keep bombarding them with Sinestro's SP1. When Catwoman tags in and attacks you with her basic attacks, well, JACKPOT! - FULL 3 bars of power! When both Nightwing and Batman died, the helmet's DOT can fry the Cat. Now it's 3v1, you should win.
- Jessica Cruz: Give her LexCorp Chest Armor V2, LexCorp Helmet V2 and any gear (preferably Tantu Totem, Astro-Harness or Quake Engine). Her teammate should be the usual Green Lantern duo. Fight until you can fire off SP2, and watch them burn. Quake Engine can re-trigger DOT (it's overheat!)
If you don't have 2/3 Lexcorp, just fight cautiously with strong characters and DOT. Catwoman/Arkham Knight can inflict DOT on enemy Catwoman right at start of the match, and keep damaging her when she tags out. Quake Engine can re-trigger DOT in case enemies tag-out. Batgirl/Cassandra Cain is as good as usual, and so are The Master's Death Cart and The Ibistick. Batman/Batman Ninja, with the right setup (usually with Cloak of Destiny), can deal HUGE damage with his SP2 (can be over one million!), removing a great chunk of Catwoman's health. Static/Prime is immune to power drain and can stun with SP1 (Bane/Luchador loves this). Either way, at this point, you should have enough experience and advanced knowledge about characters and gears to create your own strategy. Congratulations, you have beaten Standard Battle!
No, Bonus Battle 9 is still waiting for you. This battle consists of Nth Metal characters only (read more about their Dark Power mechanic if you don't know), with Radiation as its handicap. The enemy teams are just a mix and combination of six MAXED metal characters (pretty boring, right):
- Black Adam/New 52: Has 100% chance to strike you upon your tag-in when he's inactive. Avoid tagging if he isn't the active character, and his passive is disabled when he is knocked out. His lightning orb on tag-in deal constant DOT to you and reduce special damage taken.
- Catwoman/Batman Ninja: Her basic attacks gain power drain and damage boost on tag-in. By far the most dangerous metal card. Her power drain is glitched and will drain all of your power. LexCorp Set can exploit this, however. Her dark specials can steal gear and inflict unrinsable bleed (same as Catwoman/Arkham Knight!)
- Nightwing/Batman Ninja: All enemies gain power drain on tag-in, which is very annoying. His dark specials can lock your specials, and Batman Ninja teammates (including Nightwing himself) can gain power from blocked special moves.
- Shazam/New 52: The second most dangerous foe to watch out. He leaves the match at low health and return with 21 seconds of KO Immunity! So knock him out without letting him reach the health threshold by strong one-hit attack or kill him last.
- The Batman Who Laughs/Metal: His teammates apply bleed on tag-in, which deal damage over time and increase damage dealt to the victim. His tarot cards aren't that strong, however.
- The Merciless/Metal: Feel relaxed when facing this guy. His unblockable special effect after successful 7-hit combo is pretty unpractical (but don't let your guard down). The armor on tag-in doesn't affect much, it's just like extra health, and with their already gigantic health, a little more wouldn't matter much.
Be careful against their tag-in effect combo, and team bonus: Catwoman + Nightwing, Shazam + Black Adam. Now, as this late game when you're already experienced and skilled, you're on your own. Finish this battle with everything you got!
*TIP! Bonus Battle 9 gives the most XP in the game, but unless you are mad, Bonus 8 is the better place for XP as it's MUCH easier*